
This post may contain affiliate links. See our disclosure policy.
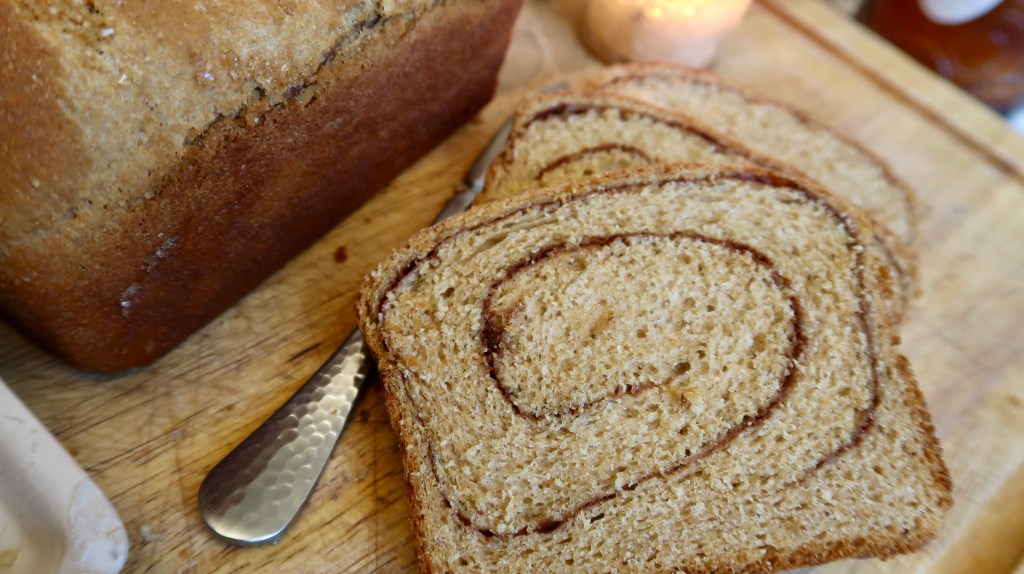
Do you love a slice of toasted, buttery cinnamon swirl bread in the morning? How about an impressive, beautiful loaf for the holiday season? If that sounds lovely, I think that my Fresh-Milled Cinnamon Swirl Bread is the recipe for you!
This bread is full of flavor from the cinnamon swirl, and full of nutrients from the fresh-milled flour. With a soft, flavorful crumb, I think that this wholesome bread will become your family’s new favorite treat.
If this sounds delicious to you, then please read on!
Why Bake with Fresh-Milled Flour?
Simply put, it is much more nutrient-rich.
When wheat is milled and the bran and germ are removed to create all-purpose flour, most of the fiber, vitamins, minerals, and healthy fats are lost. What remains is mostly starch and some protein. Because starch is rapidly broken down into glucose, baked goods made with white flour can cause a much sharper rise in blood sugar compared to whole-grain versions.
Below is a chart listing all of the nutrients contained in the simple, whole wheat berry. It’s amazing!
✨ Nutrients in Fresh-Milled Whole Wheat Flour
Fresh-milled flour is rich in naturally occurring nutrients that are often lost in store-bought white flour. By milling your own grains at home, you retain the full spectrum of vitamins, minerals, and fiber—exactly as God designed it.
🌾 Macronutrients
- Protein
- Healthy Carbohydrates
- Dietary Fiber
- Natural Fats (small amounts)
💪 Key Vitamins
- Thiamine (B1)
- Riboflavin (B2)
- Niacin (B3)
- Pantothenic Acid (B5)
- Pyridoxine (B6)
- Folate (B9)
- Vitamin E
🧂 Essential Minerals
- Iron
- Magnesium
- Phosphorus
- Potassium
- Calcium
- Zinc
- Selenium
- Copper
- Manganese
- Natural Sodium (very low)
Note: Nutrient content can vary depending on the wheat variety and freshness, but fresh-milled flour is always more nourishing than refined alternatives.
Check out my blog post here for a more thorough breakdown of the benefits of fresh-milled flours.
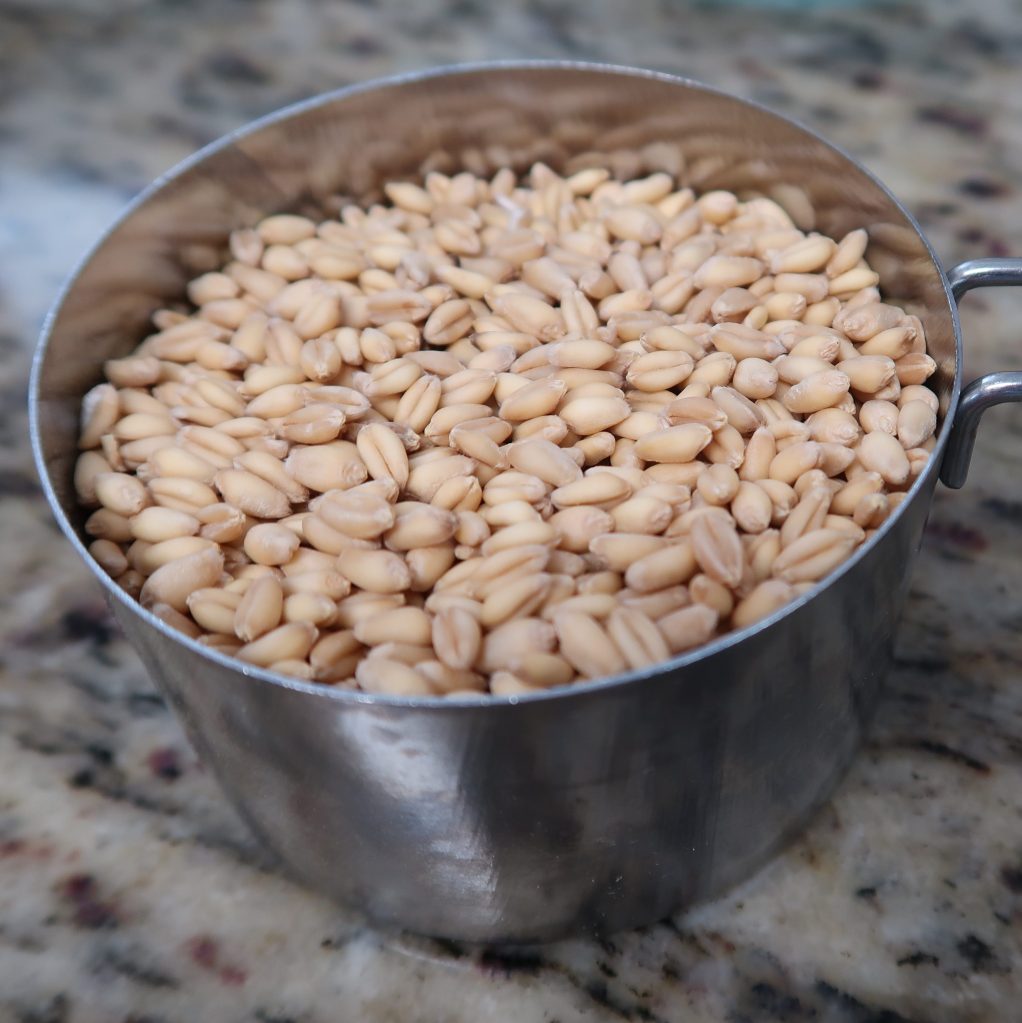
What Type of Wheat Berries Should I Use?


Different wheat berries contain varying amounts of protein, and two key proteins are essential for creating a strong gluten network: glutenin and gliadin.
- Glutenin – Gives dough strength and elasticity, helping bread hold its shape and rise.
- Gliadin – Makes dough stretchy and extensible, allowing it to expand during fermentation and baking.
When these two proteins work together, you get a strong, resilient gluten network that produces a perfect rise.
For yeasted breads, choose hard red or hard white wheat, which have enough protein to create soft, fluffy loaves.
If you enjoy experimenting with ancient grains, feel free to mix them with your hard wheat. Just keep in mind that using only ancient grains may result in a lower rise.
I’ve had success with this hard white wheat, hard red wheat and spelt berries.
Check out my blog post that gives more information on wheat berries and their uses.
Why Powdered Milk?
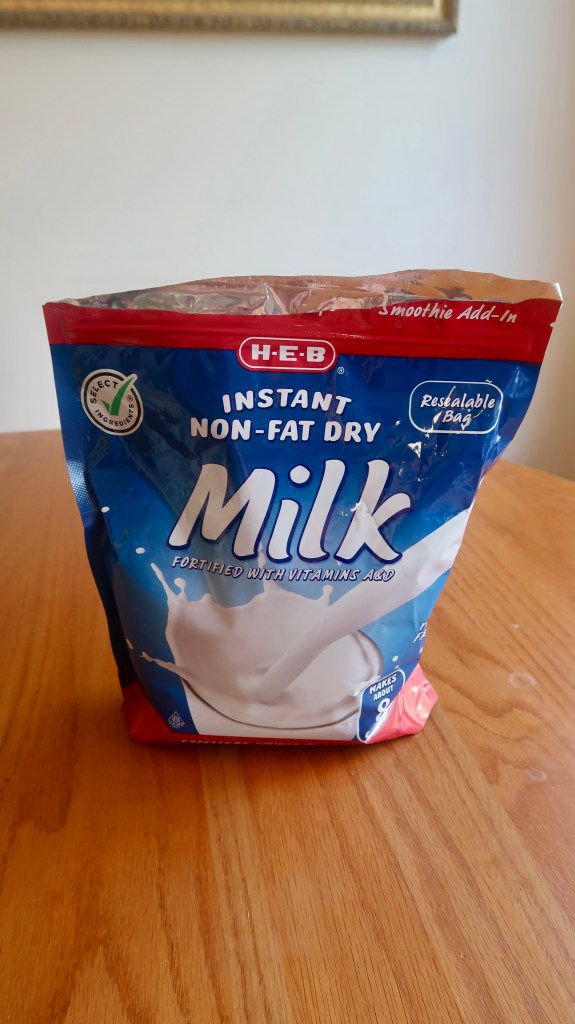
Powdered milk is a wonderful resource for bakers, especially in a large family kitchen. It helps create a softer crumb and improves flavor, while the added protein and milk sugars support better rise and beautiful browning in your dough.
Also, from a purely practical aspect, it is much easier to reserve powdered milk for baking. No one will be reaching for that to drink in the morning. It’s economical too!
Why Autolyse Your Dough?
When a wheat berry is milled, the bran, germ, and endosperm are broken into fine pieces. The fluffiest part is mostly the endosperm—the same part found in store-bought “all-purpose” flour. The bran and germ are coarser, which makes them slower to absorb liquid in your dough.
Autolyse simply gives the flour time to absorb the water, making the dough easier to knead and helping develop a stronger gluten network.
What is Vital Wheat Gluten and Why Use It?
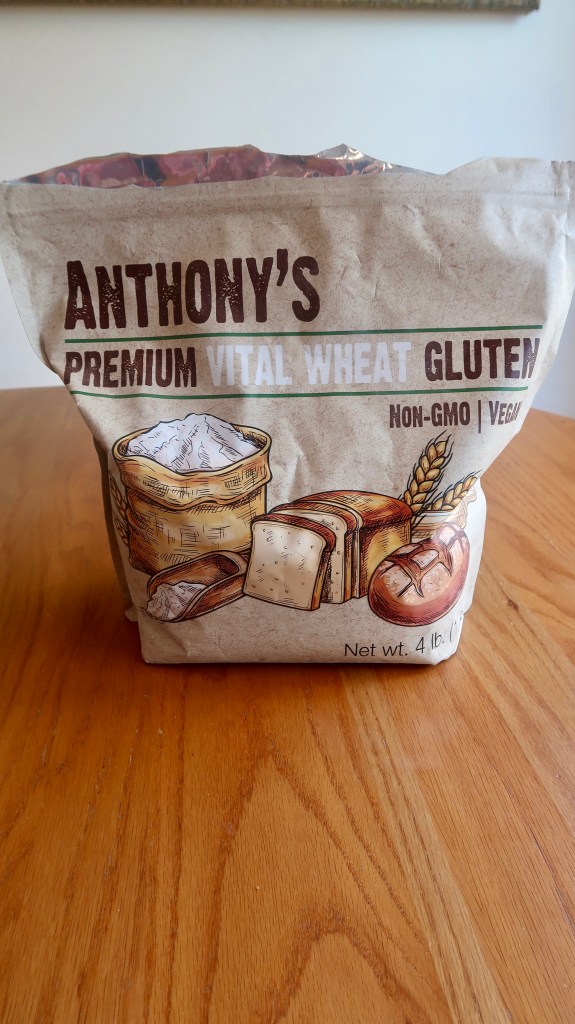
Vital Wheat Gluten is a natural protein extracted from wheat. The wheat is first hydrated, then washed to remove the starches, leaving behind only the protein. This protein is what creates the “gluten network” — the stretchy structure that gives your favorite breads their chew and rise.
Whole wheat breads naturally have a lower rise than their all-purpose counterparts because the bran and germ in fresh-milled flour are quite sharp. These coarse pieces can cut through the developing gluten strands during fermentation, resulting in a denser finished loaf.
By adding Vital Wheat Gluten to your dough, you’re essentially boosting the protein content (a.k.a. the gluten), which helps create a stronger structure and a higher rise. It’s not a necessary ingredient, but it can make a noticeable difference if you’re aiming for a lighter texture.
I enjoy using it in many of my whole-grain recipes and recommend you give it a try, too. Plus, a little goes a long way! A good starting point is to add 1 tablespoon of Vital Wheat Gluten per cup of whole wheat flour in your recipe.
I use this Vital Wheat Gluten in my kitchen — it’s reliable and lasts forever.
Ingredients You’ll Need
For the Dough
- Fresh-milled Flour
- Water
- Unsalted Butter
- Sugar
- Cinnamon
- Dry Instant Milk
- Leavening: Salt and Yeast
- Optional: Vital Wheat Gluten
- Optional: Melted Unsalted Butter and Turbinado (Coarse) Sugar for Topping
For the Cinnamon Swirl
- Cinnamon
- Sugar
- Beaten Egg
Step-by-Step: How to Make Fresh-Milled Cinnamon Swirl Bread
Step 1: Mill Your Wheat Berries
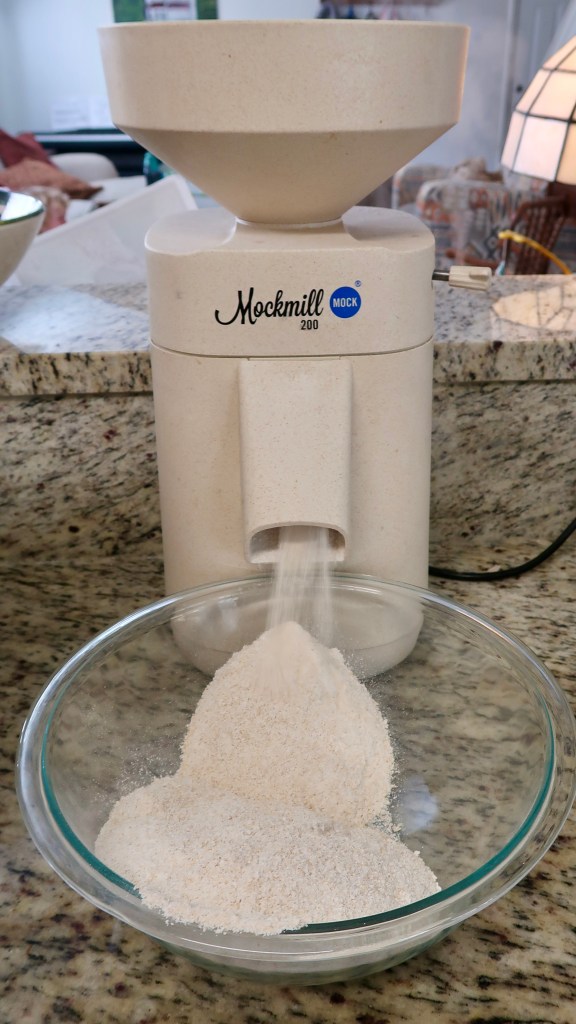
Mill your wheat berries right before mixing for best results.
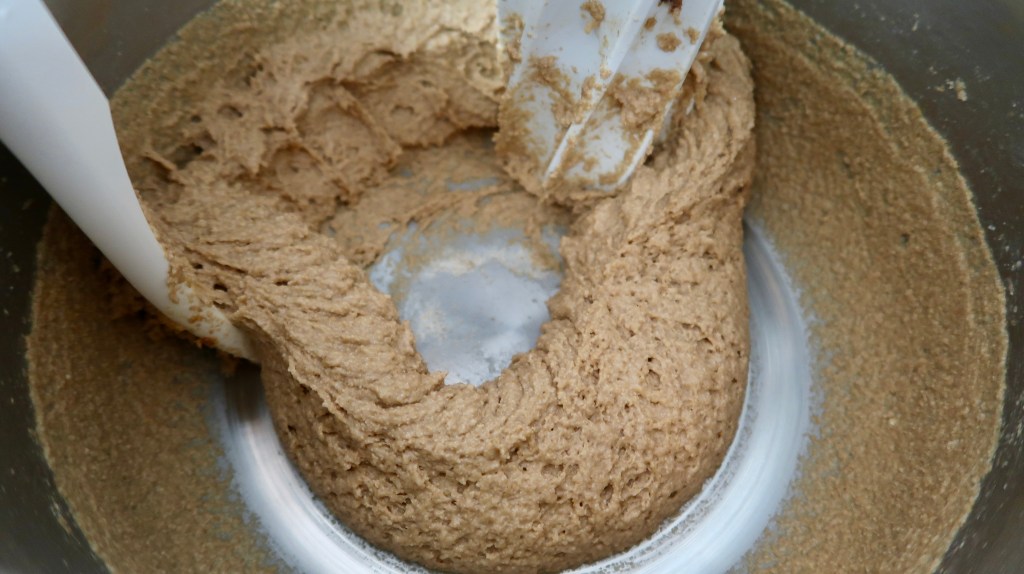
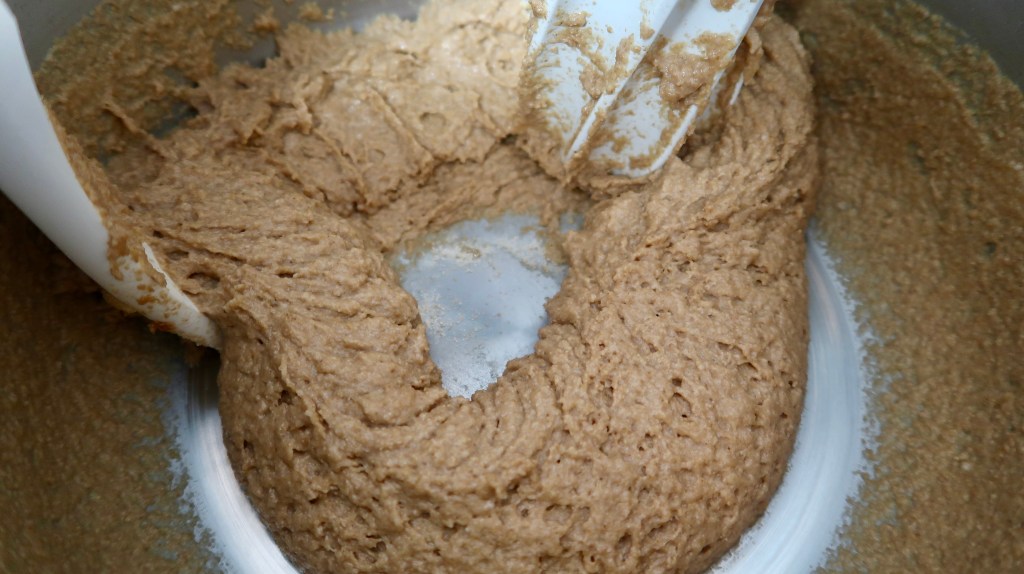
Step 2: Mix flour, water, unsalted butter, sugar, cinnamon, dry instant milk (and Vital Wheat Gluten, if using)
Combine all of your ingredients except the salt and yeast until no dry flour remains.
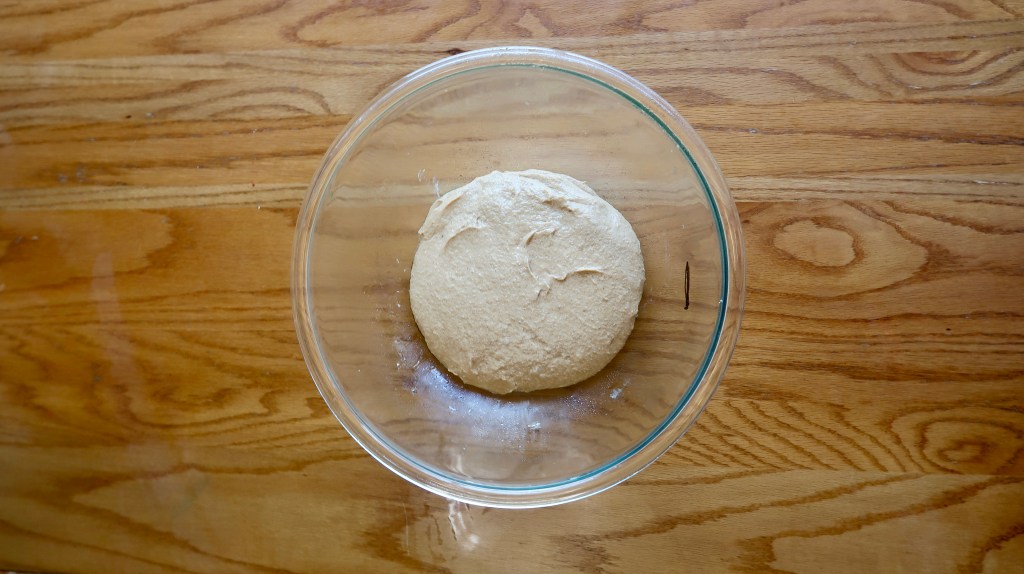
Step 3: Autolyse your dough, covered for 1 hour
Let your dough rest, covered, 1 hour for the bran and germ to absorb the liquid.
Step 4: Add salt and yeast; Knead your dough until it has sufficient pull

Add your remaining ingredients (salt and yeast) and knead the dough until you can pull it away from the dough ball without instantly tearing. If you can achieve a windowpane (like in the picture above), you will have your best results.
Step 5: Bulk Fermentation
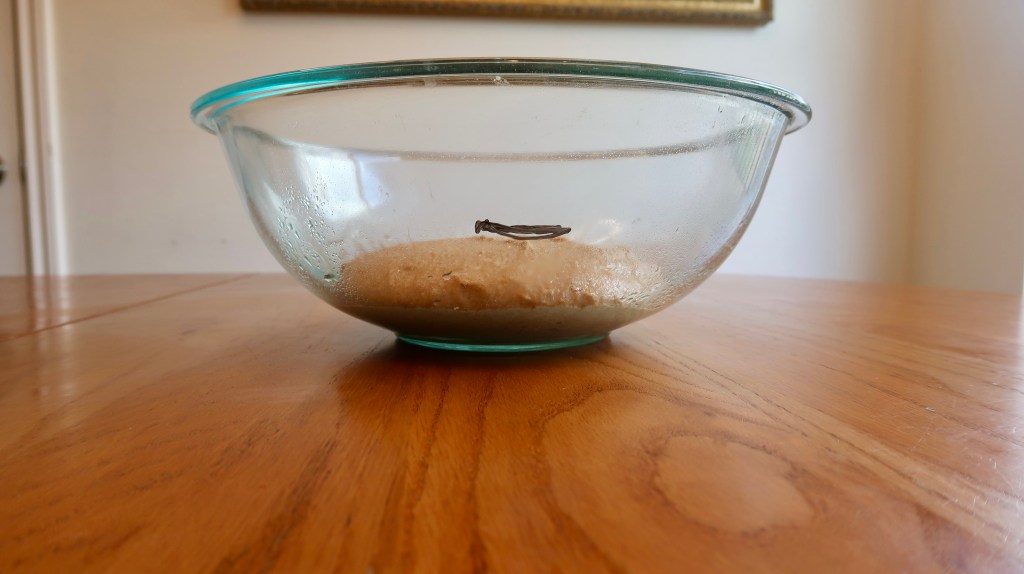
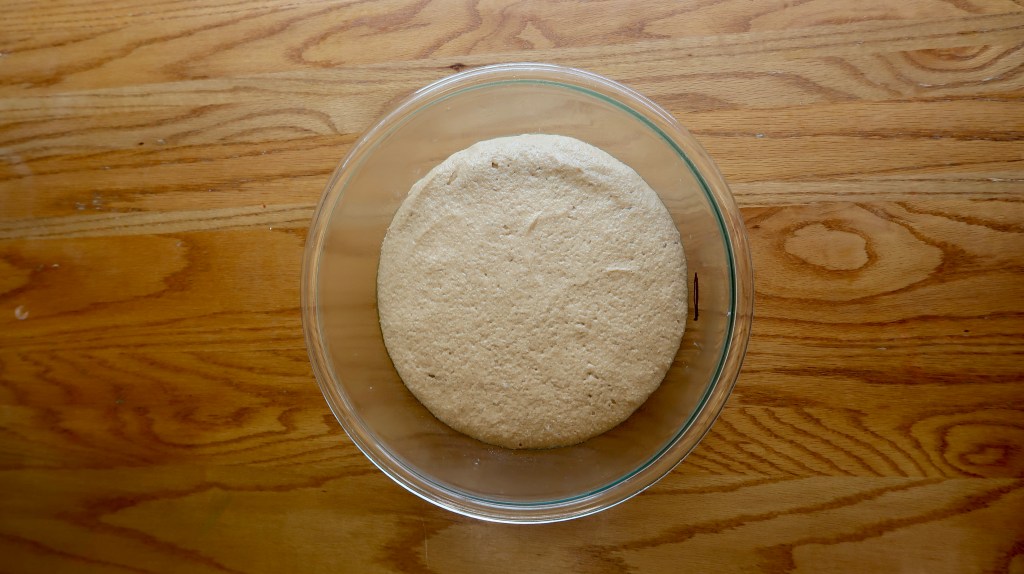
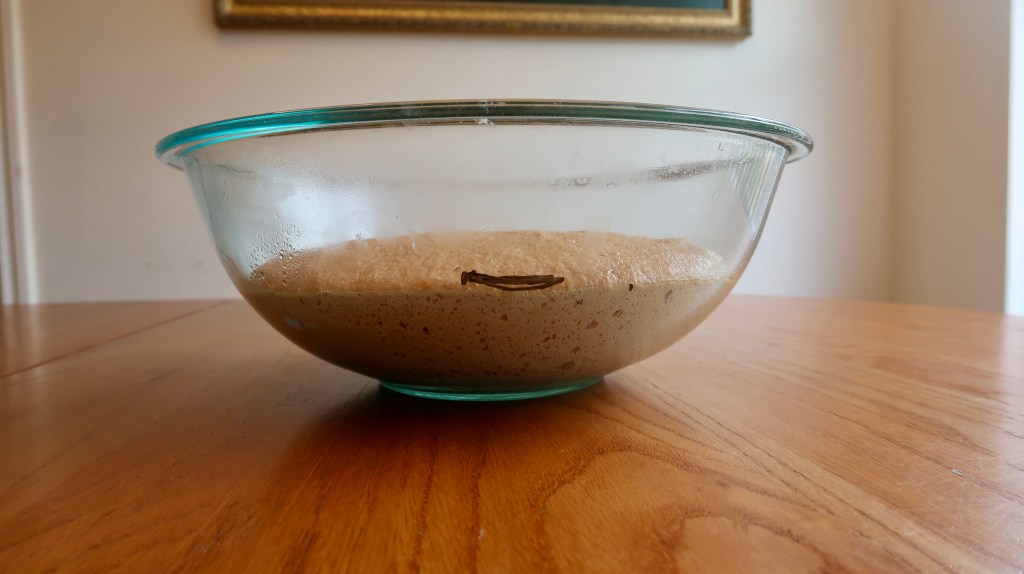
Let the dough ferment, covered, until slightly less than double in size.
Whole-wheat dough benefits from a lower bulk rise than all-purpose flour because the bran and germ can weaken the gluten network in the dough.
It’s very helpful to let your dough rise in a clear container, like the one I have above. Use a dry-erase marker to mark the top of your dough, and aim for it to rise to just under double that line.
I recommend taking a picture when you decide to stop the bulk rise and shape your dough. If your loaf turns out denser than you’d like, you’ll have a visual reference for how much it rose and can adjust next time.
Baking is all about trying over and over and over again.
✨ Tip to remember: When you press your finger into the dough, it should slowly spring back and leave a small indentation.
Step 6: Shape your loaf and rise
Mix your 50 grams sugar with 2 tsp cinnamon for the swirl. Beat your egg.
Generously oil or line with parchment your bread pan.
Shape your loaf by laying out onto a well-oiled or lightly floured surface. Use your hands, or a rolling pin, to gently press the dough into a roughly 8×20 inch rectangle. Brush the dough with your beaten egg. Sprinkle the cinnamon sugar on top of the brushed dough, leaving a slight border along the edges.
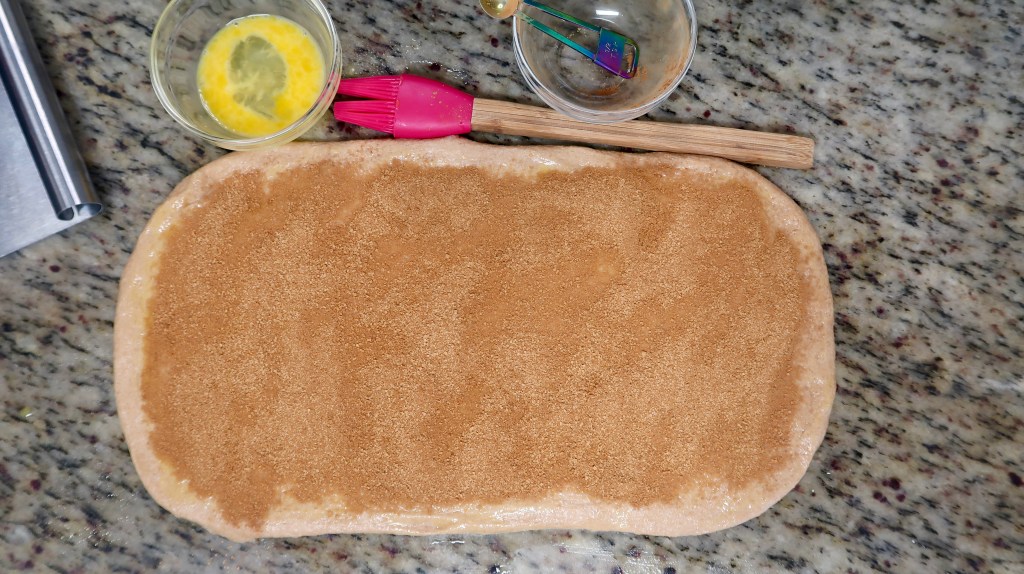
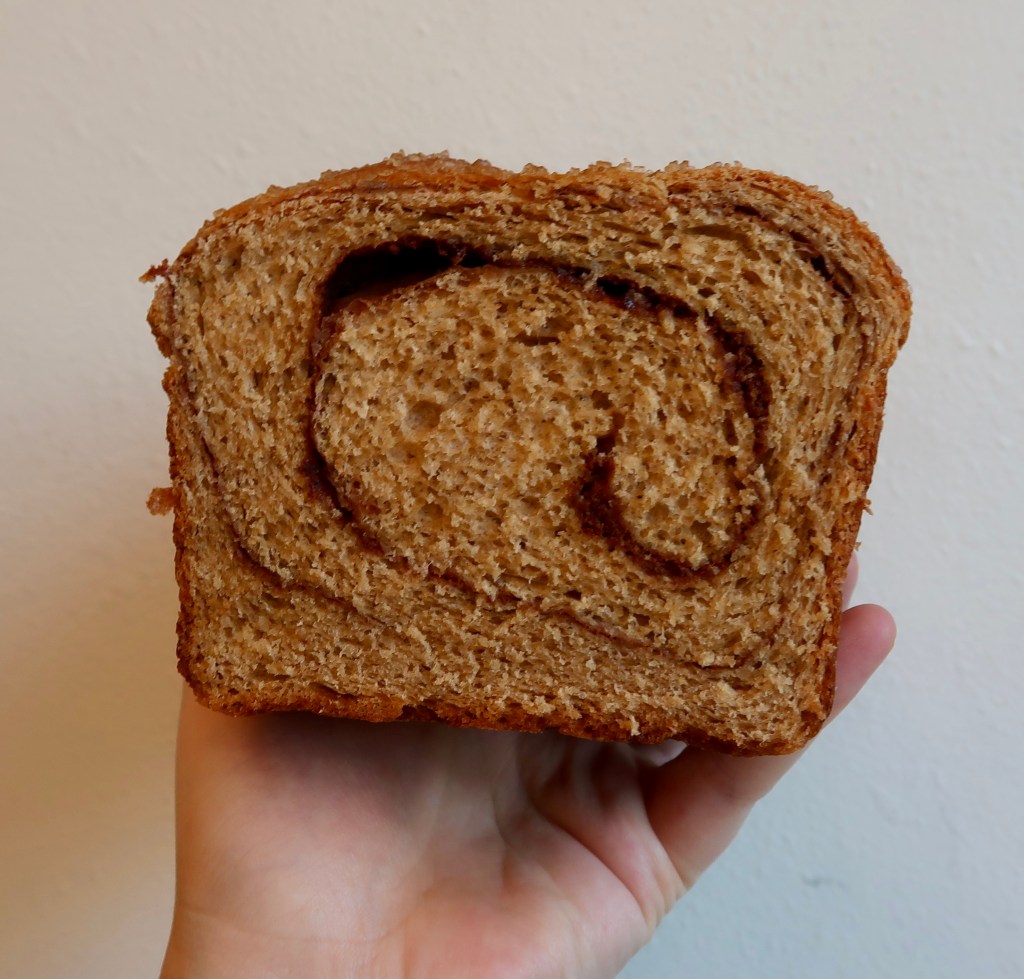
Now comes the swirl!
Use your hands, a bench scraper can be helpful with this, to slowly roll into an 8-inch log. Start as close to the edge as possible to get a tight swirl. I like to tuck in the edges as I roll the dough. Pinch the seam closed when you are done and place in your well-oiled bread pan. Cover with oiled plastic wrap.
Preheat your oven to 350°F.

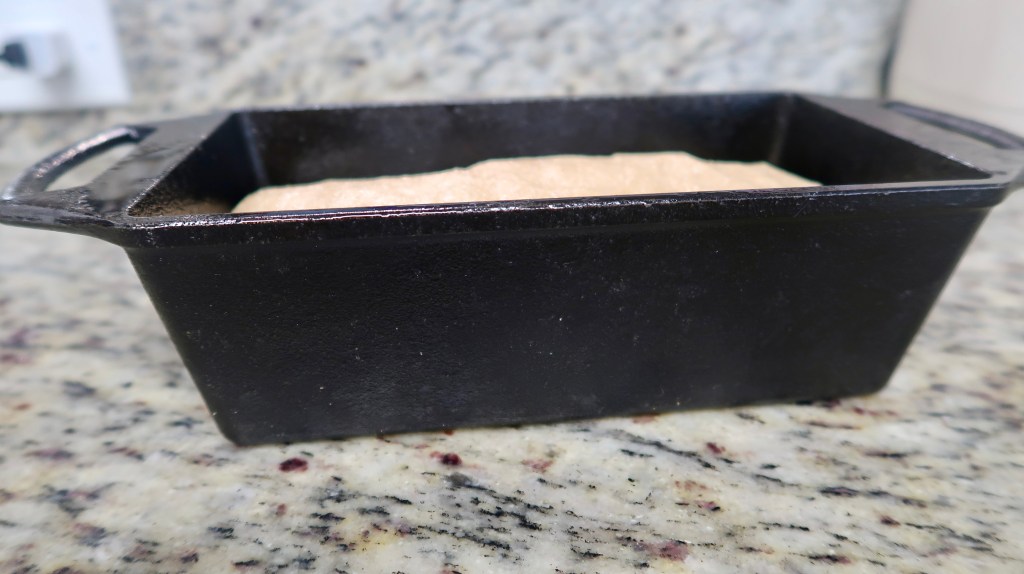
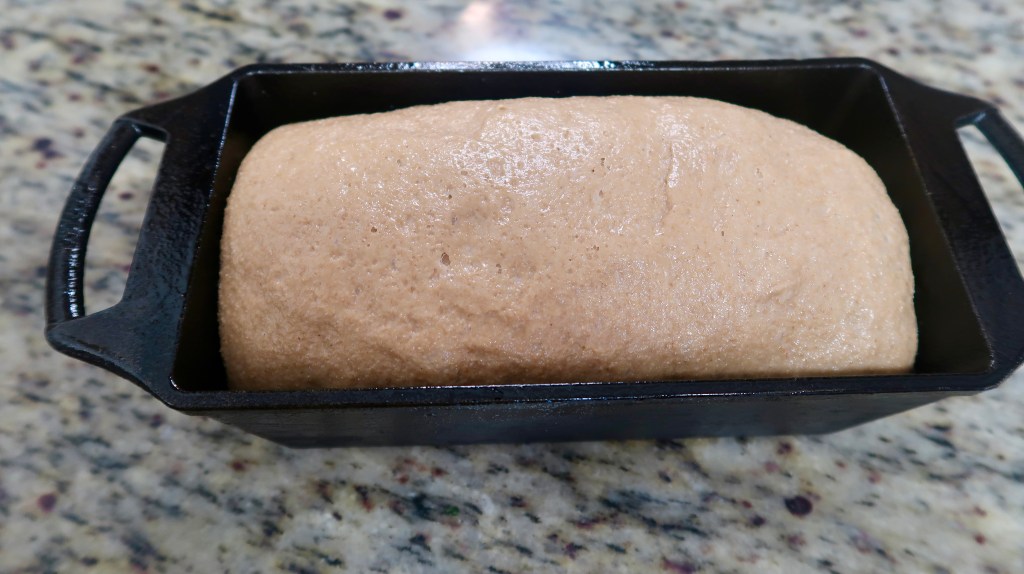
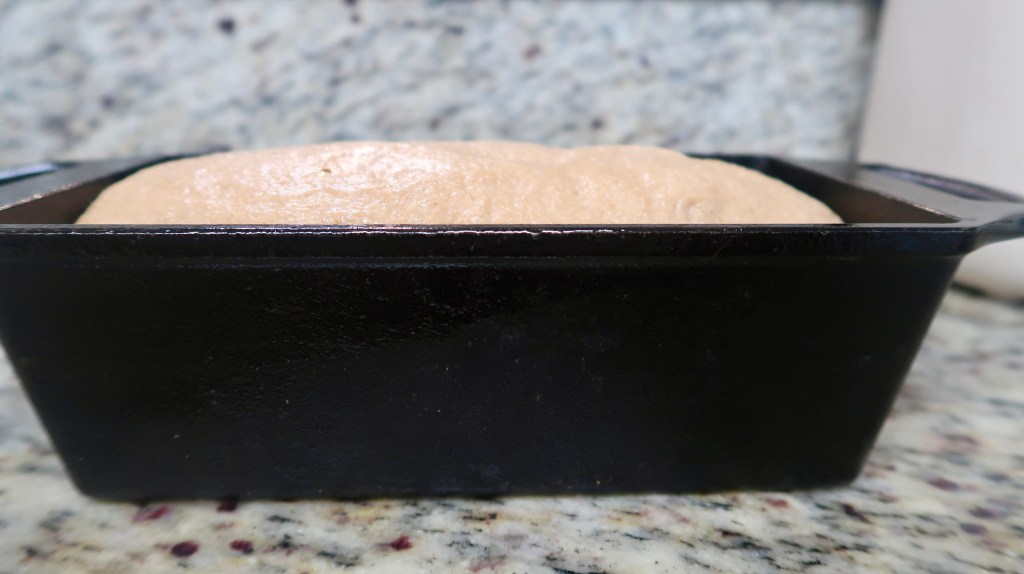
Let proof until the dough slightly rises above the pan.
✨ Check out the video above for step-by-step shaping help!
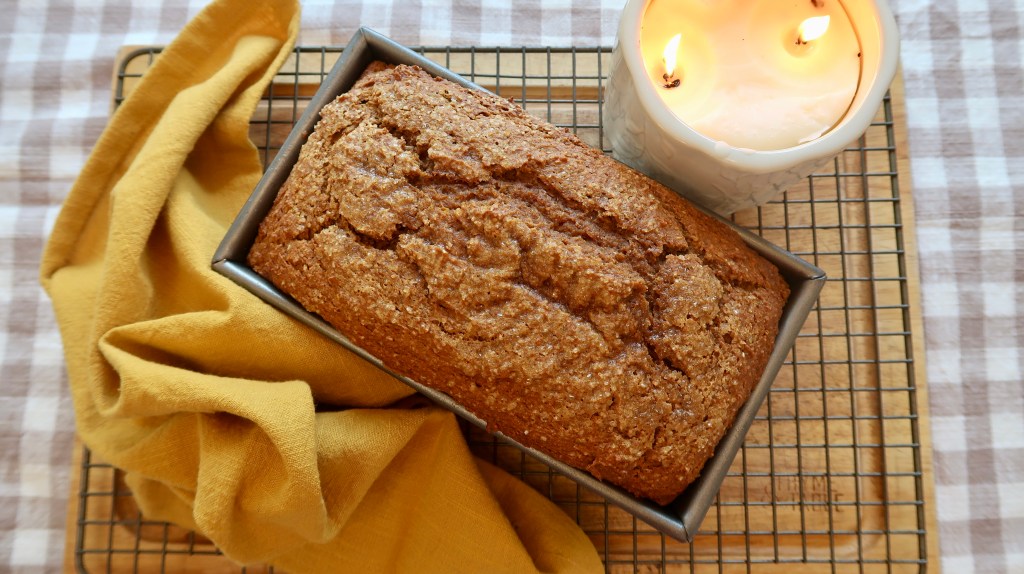
Step 7: Bake your loaf

Optional: Brush with melted unsalted butter and sprinkle on Turbinado sugar.
Bake for 35 minutes, then cover with aluminum foil and bake for another 10 minutes.
To prevent a slight collapse in the center, let the bread cool—covered with a kitchen towel—for 10 minutes in the pan. Then remove it to a cooling rack and let it finish cooling, still covered. The gentle steam helps the loaf maintain structure that can be softened by the cinnamon swirl.
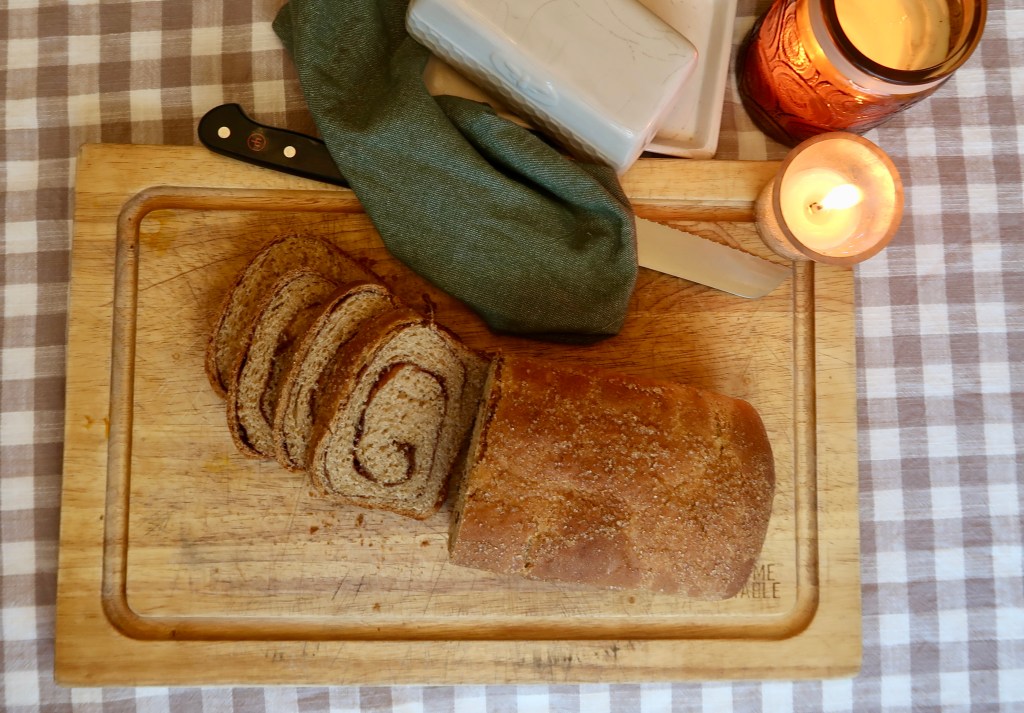
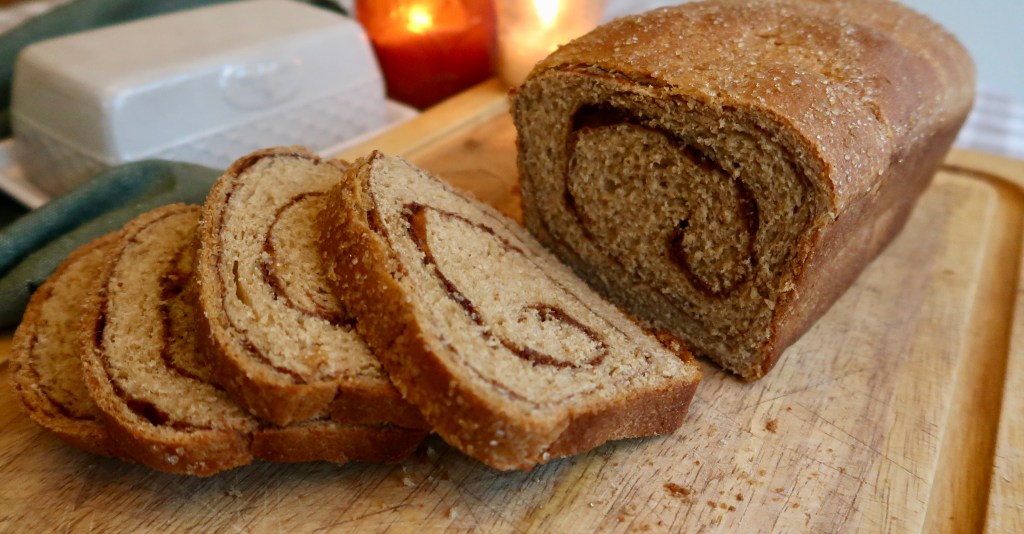
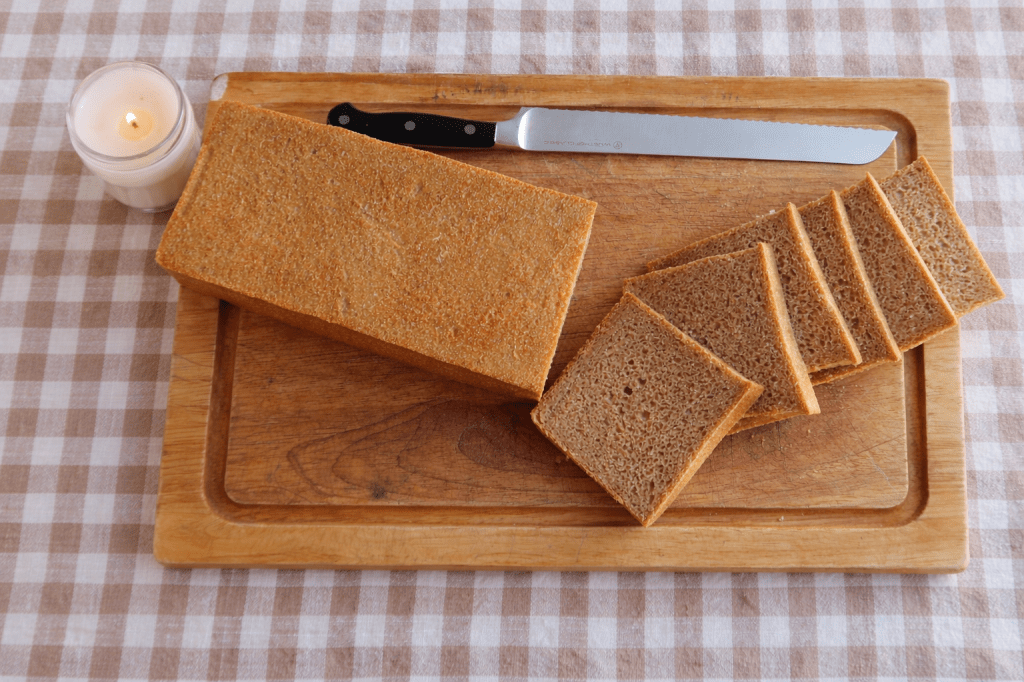
Enjoy!
Fresh-Milled Cinnamon Swirl Bread
A soft, swirled loaf made with fresh-milled hard white wheat.

Ingredients
Dough
- 3 cups (340 g) fresh-milled hard white flour
- 1 cup (255 g) water
- ⅓ cup (28 g) instant dry milk
- 2½ tbsp (35 g) sugar
- 1 tsp ground cinnamon
- 4 tbsp softened unsalted butter
- 1¼ tsp salt
- 2½ tsp instant yeast
Swirl
- 1 beaten egg (for egg wash)
- ¼ cup (50 g) sugar
- 2 tsp ground cinnamon
Optional (if using vital wheat gluten)
- 10 g vital wheat gluten — if using, change flour to 330 g and water to 265 g.
Directions
- Mill your wheat. Fresh-mill your hard white wheat to yield the flour measurement above.
- Mix dry + wet (autolyse mix). In a large bowl, combine the flour, water, instant dry milk, sugar, cinnamon, and softened butter. Mix until no dry flour remains. Cover and let rest (autolyse) for 1 hour.
- Add salt and yeast; knead. After autolyse, sprinkle in the salt and yeast. Knead until the dough stretches without tearing and a windowpane can be achieved.
- Bulk rise. Let the dough bulk rise until nearly doubled — this typically takes about 1 hour 30 minutes to 2 hours, depending on temperature.
- Prepare pan & oven. Line a standard loaf pan with parchment or grease it generously. Preheat your oven to 350°F (177°C).
- Make the cinnamon sugar & egg wash. Mix the ¼ cup (50 g) sugar with 2 tsp cinnamon. Beat the egg and set aside.
- Shape & fill. Lightly flour your work surface. Stretch the dough into a rectangle about 8 × 20 inches. Brush the surface with the beaten egg, leaving roughly a 1-inch border all the way around. Sprinkle the cinnamon sugar evenly over the egg wash.
- Roll & seal. From a short end, begin rolling the dough tightly a little at a time using a bench scraper to help. Pinch the seam closed when you finish rolling.
- Final proof. Place the rolled loaf seam-side down into the prepared pan. Cover with oiled plastic wrap and let rise until the dough is slightly above the edge of the pan — about 45 minutes, generally.
- Optional finish. If desired, brush the top with melted butter and sprinkle with turbinado sugar before baking.
- Bake. Bake at 350°F for 35 minutes. Tent with foil, then bake an additional 10 minutes.
- Rest to prevent collapse. Remove from oven and immediately lay a clean tea towel over the top of the loaf (while still in the pan). Let rest in the pan for 10 minutes. Then invert the loaf out of the pan and let it finish cooling with the tea towel draped over it — this helps prevent the center from caving in slightly.
- Enjoy. Cool fully before slicing and enjoy! This loaf freezes well when wrapped tightly.
Notes & Tips
- If you choose the vital wheat gluten option, reduce the flour to 330 g and increase the water to 265 g as listed above.
- Autolyse (rest) improves extensibility — it helps you get a good roll and a clean swirl.
- Rise times will vary with temperature; the times provided are typical for a warm kitchen.
- For a deeper cinnamon flavor in the swirl, you can brush the dough with melted butter before sprinkling the cinnamon sugar.
Tips for Success
- Use warm ingredients for a consistent rise.
- Use a kitchen scale to weigh your ingredients.
- Autolyse, or let your dough rest without salt and yeast, covered, for 1 hour to give the bran and germ time to soften.
- During bulk fermentation, let the dough rise until just under doubled in size.
- During the shaped rise, let the dough rise until slightly above the loaf pan.
- Tightly and slowly roll the dough, pulling in the edges as you roll, and pinch the seam closed when done.
How to Store and Freeze Cinnamon Swirl Bread
Instead of constantly running through plastic wrap, I suggest purchasing a bread bag. My sister bought me one years ago, and I’ve used it exclusively ever since. I’ve found it to be very reliable for keeping bread fresh.
It’s important to understand, though, that homemade bread doesn’t last as long as store-bought. By day three, we always start to toast our slices.
Cinnamon Swirl Bread freezes really well! I recommend making extra to store in your freezer for rainy days. Let the bread cool completely, pre-slice the loaf, wrap it in freezer paper and then plastic wrap, and don’t forget to label it.
✨ Amazon doesn’t carry the bag my sister bought me anymore, but this one looks nice!
Serving Ideas
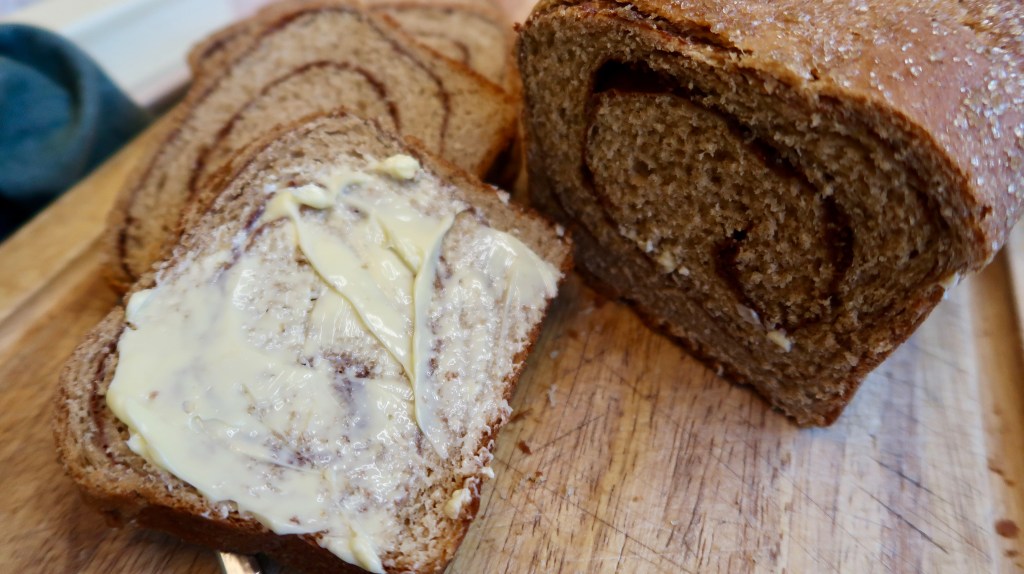
- A true classic: toasted with warm, salted butter.
- Toasted, topped with cream cheese and a drizzle of honey… and maybe some delicious figs.
- Top with creamy peanut butter and sliced banana.
- Toast and top with vanilla ice cream and a drizzle of caramel for an exciting dessert.
Variations to Try
- Double the loaf, braid it into a wreath, brush with an egg wash, and sprinkle with coarse sugar. That’s worthy of any festive event!
- French Toast — let the bread go slightly stale and have the best French Toast of your life.
- The ultimate Bread Pudding — again, let the bread go slightly stale and create the most decadent dessert.
- Add semi-sweet or dark chocolate chips to the swirl for something truly spectacular.
Troubleshooting: Common Fresh-Milled Bread Questions
Why did my cinnamon swirl separate or leave a gap in the center?
It’s very important to roll the dough a little at a time. Use a bench scraper if the dough is sticking, and try to get the roll as tight as possible. Be sure to brush the flattened dough well with the egg wash — this is the binder that keeps everything together.
How do I keep the filling from leaking out during baking?
The rolling process is key. As you roll tightly, tuck the ends in as you go. When you’re done, be sure to pinch the seam closed. You’re likely to still get a little leakage. I recommend lining your pan with parchment paper if you want to avoid a sticky cleanup.
My dough didn’t rise much — what went wrong?
Baking is a lot like gardening — trial and error are the best ways to learn. Chances are you did not knead your dough enough. Follow my instructions closely above for your best results.
How can I tell when the loaf is fully baked inside?
If you want a foolproof way to know your bread is done, insert an instant-read thermometer at an angle into the side of your loaf. If it reads 190°F, it’s done. That temperature is a general guide — if you find it to be drier than you’d like when you slice into it, lessen your bake time slightly next time.
How should I store the bread to keep it soft and fresh?
If you want the bread to stay soft from the start, let it cool directly from the oven with a kitchen towel laid on top. Then keep as much air off the loaf as possible. Plastic wrap or a bread bag are good choices.
Final Thoughts
As a little girl, I remember being so happy when my mom would purchase cinnamon swirl raisin bread from the grocery store. It was always such a special addition to breakfast.
I’m very thankful to continue that tradition with my own children, and I hope it finds a special place in your home now, too.
What’s your favorite way to enjoy Fresh-Milled Cinnamon Swirl Bread? Let me know in the comments!
Blessings,
Payton


Leave a comment