
This post may contain affiliate links. See our disclosure policy.
Is sandwich bread a staple in your home? Do you want to enhance your health with fresh-milled and sourdough baked goods?
If so, I have the perfect recipe for you!
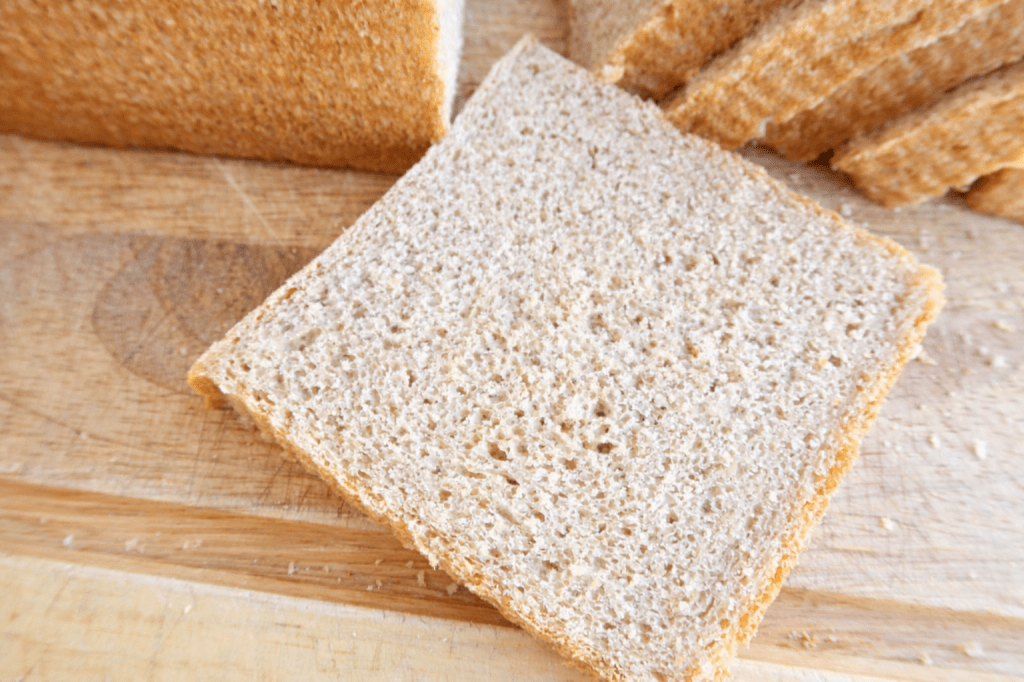
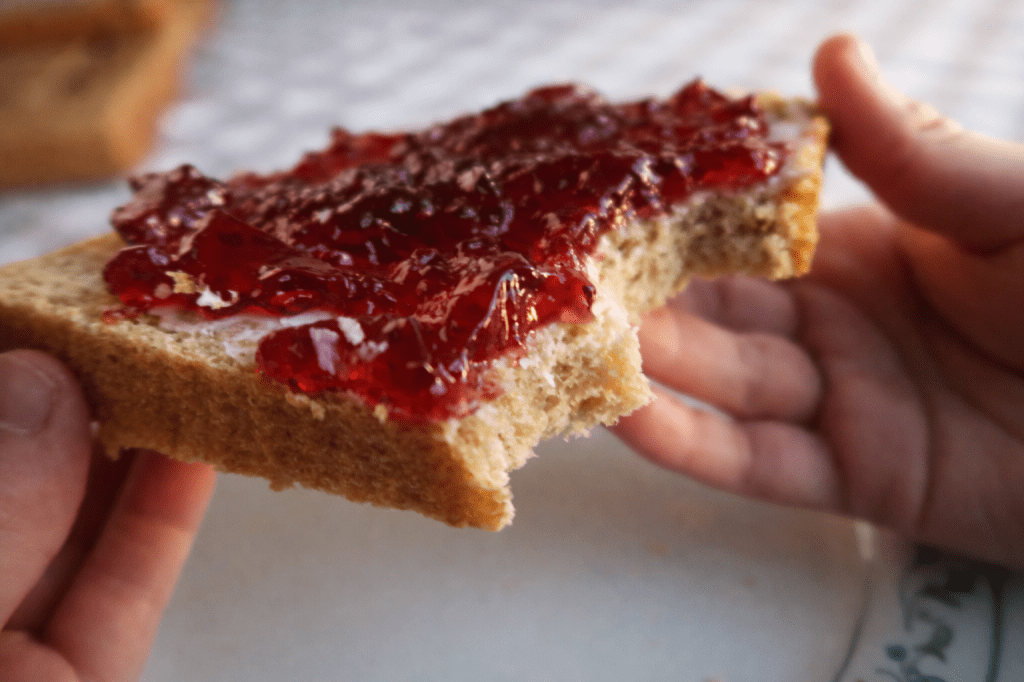
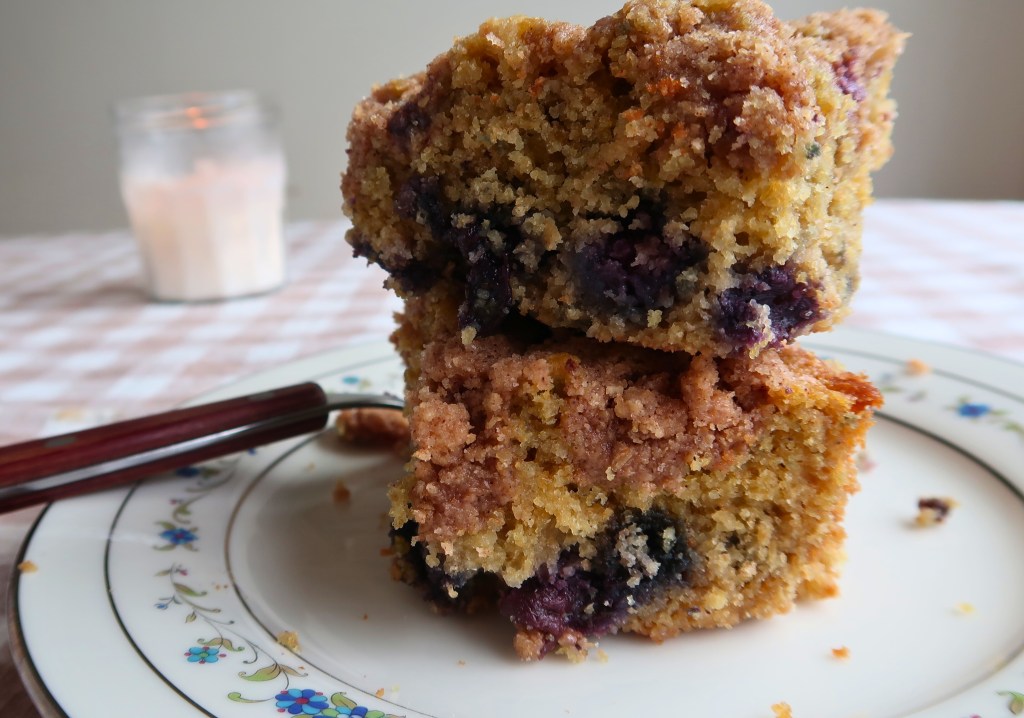
This Fresh-Milled Sourdough Sandwich Bread combines the health benefits of whole grains and sourdough. It’s loaded with flavor and perfectly soft—ideal for sandwiches. It is also highly flexible, using time to create more or less sourdough flavor. I will guide you step-by-step to create the sandwich bread you have always dreamed of.
Why This Is Our Everyday Sourdough Sandwich Loaf
Our family loves a good sandwich bread. It is actually our preference over artisan loaves.
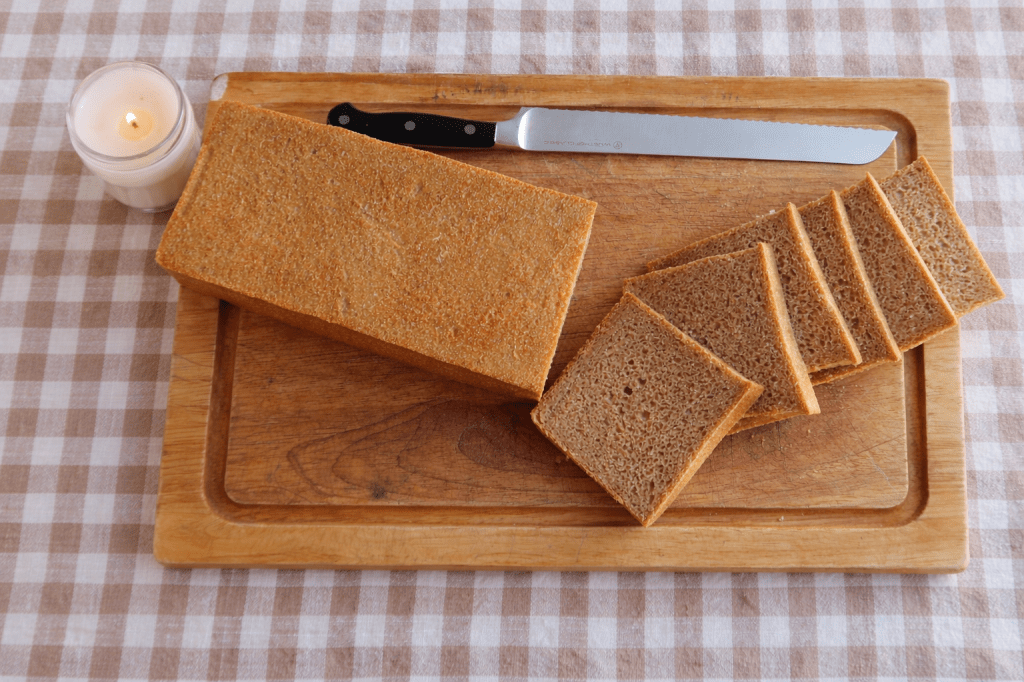
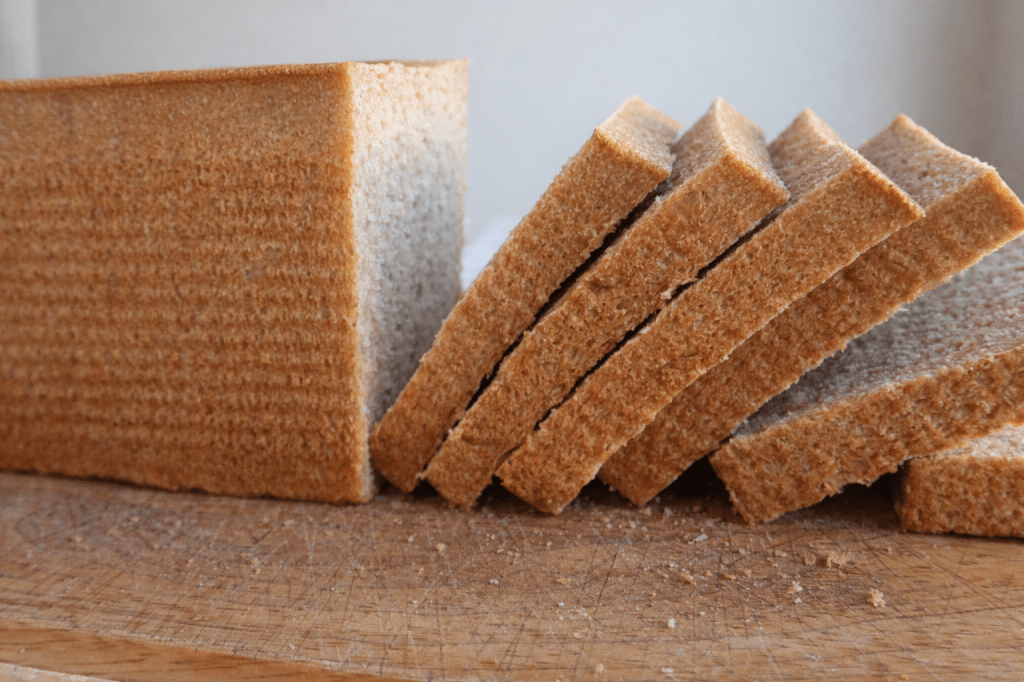
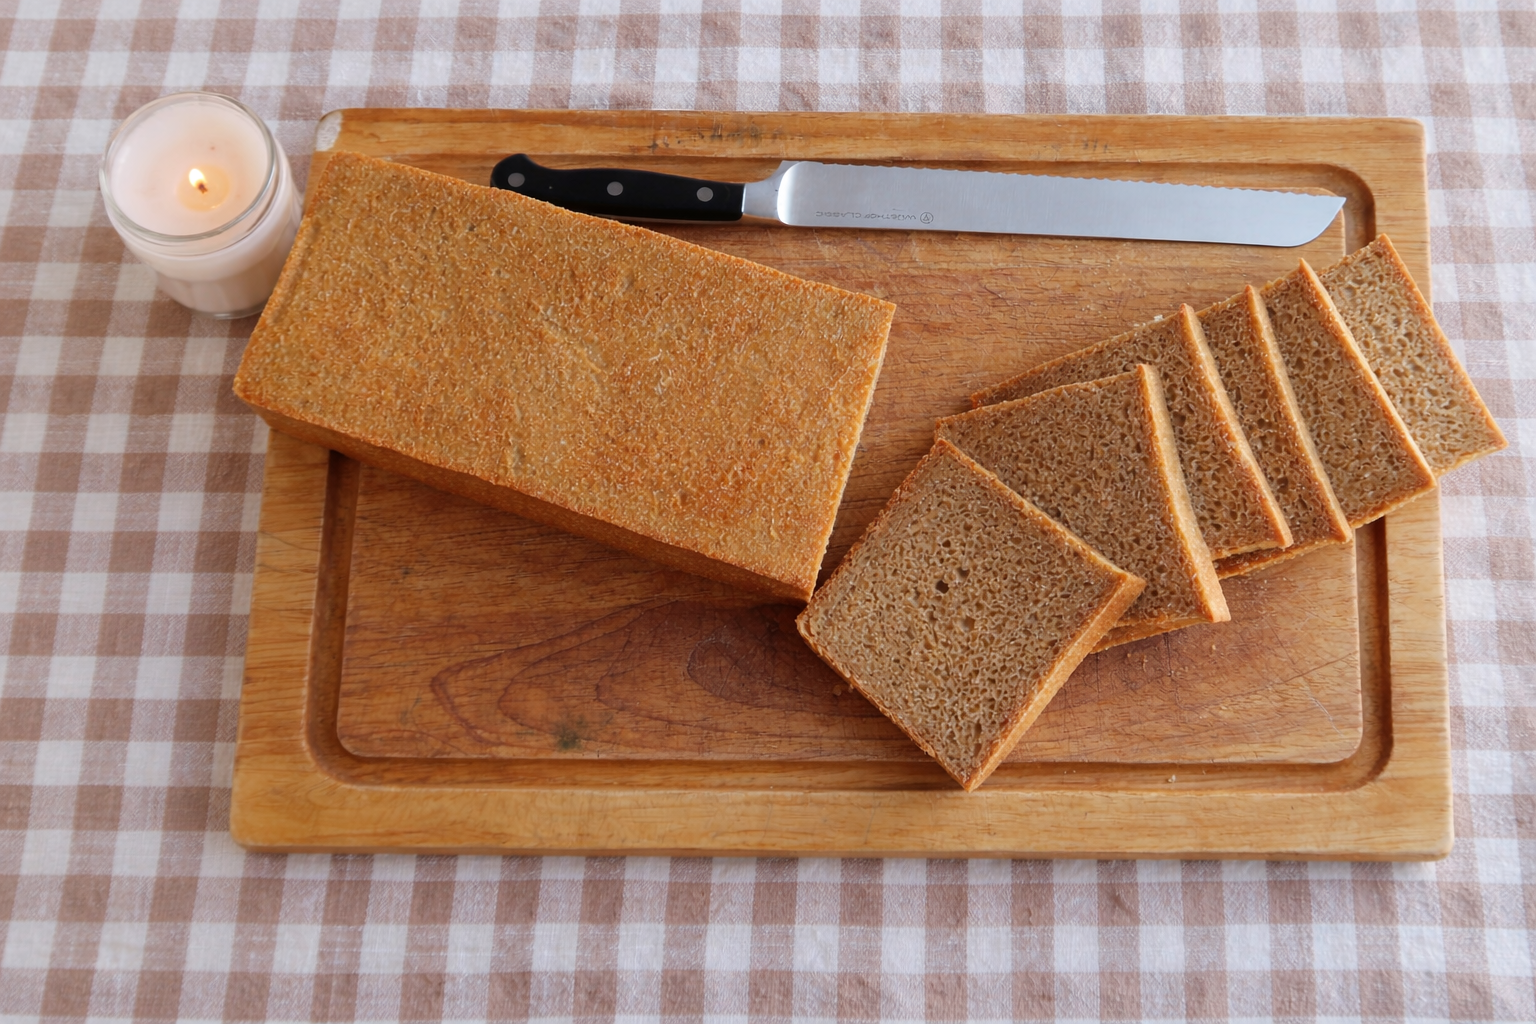
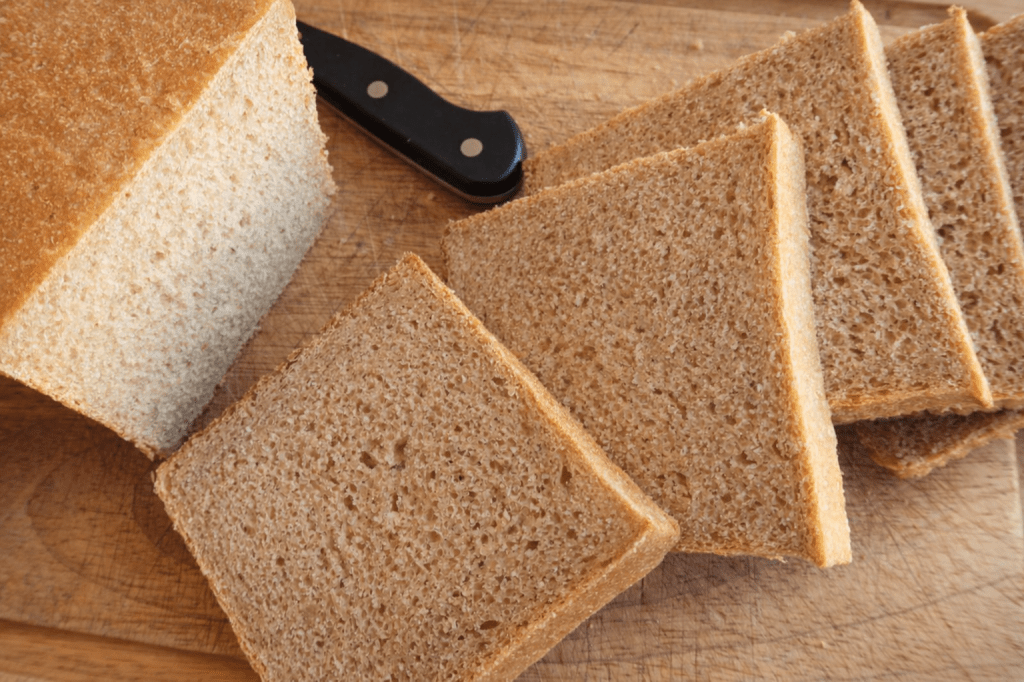
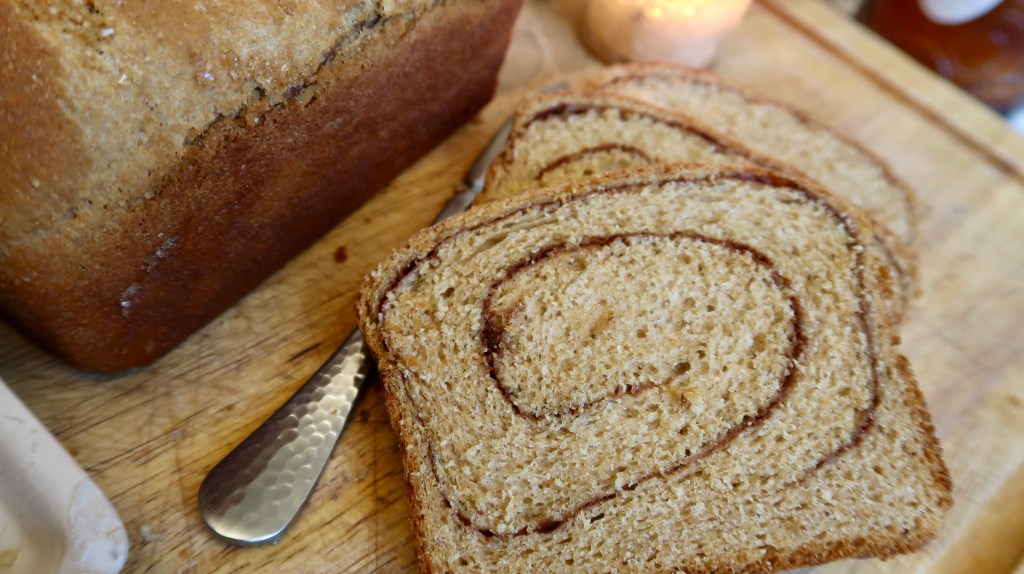
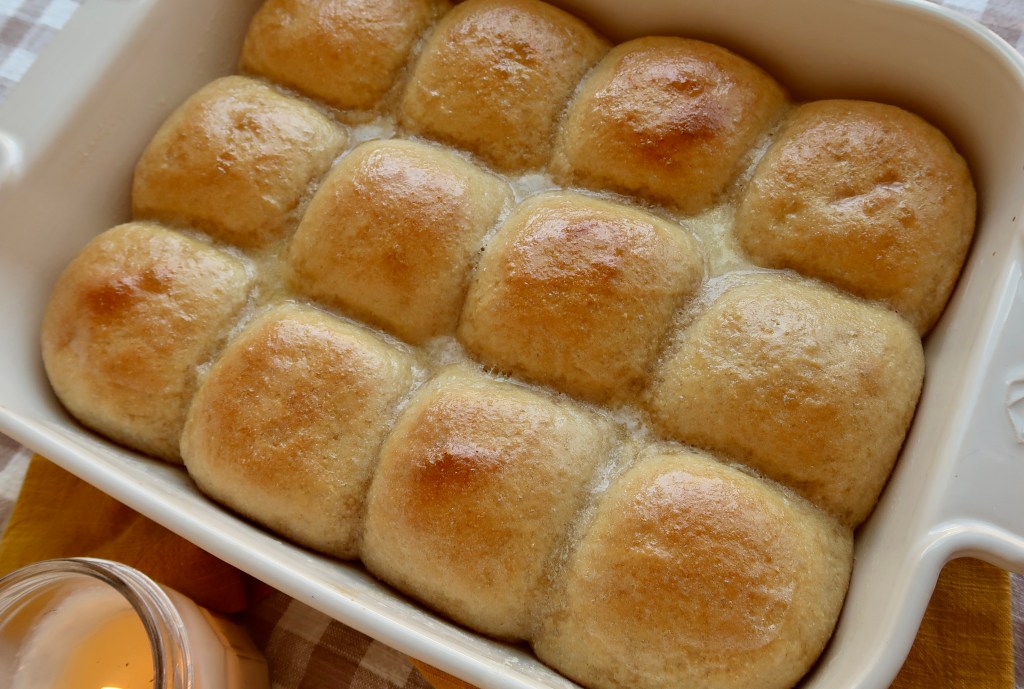
This Everyday Sourdough Sandwich Loaf (Pan de mie style) is truly the perfect sandwich bread. It’s square corners and even sides make a great sized loaf, and resembles the classic American grocery store bread we all grew up loving.
Pan de mie, simply translated to “soft bread”, is a French innovation to mimic the British style of a sandwich loaf. A lidded Pullman Pan is how you can achieve the perfect square shape. Though, this recipe works well if you do not own a Pullman Pan by simply dividing the loaf in half and using two 9×5 loaf pans.
And, you have supreme flexibility with it being sourdough. Our family’s preference is to make it a same day sourdough bake, meaning prepared in the morning and baked by late afternoon. This baking schedule gives very mild tang to the flavor of the bread.
Why Bake with Fresh-Milled Flour?
Simply put, it is much more nutrient-rich.
When wheat is milled and the bran and germ are removed to create all-purpose flour, most of the fiber, vitamins, minerals, and healthy fats are lost. What remains is mostly starch and some protein. Because starch is rapidly broken down into glucose, baked goods made with white flour can cause a much sharper rise in blood sugar compared to whole-grain versions.
Below is a chart listing all of the nutrients contained in the simple, whole wheat berry. It’s amazing!
✨ Nutrients in Fresh-Milled Whole Wheat Flour
Fresh-milled flour is rich in naturally occurring nutrients that are often lost in store-bought white flour. By milling your own grains at home, you retain the full spectrum of vitamins, minerals, and fiber—exactly as God designed it.
Macronutrients
- Protein
- Healthy Carbohydrates
- Dietary Fiber
- Natural Fats (small amounts)
Key Vitamins
- Thiamine (B1)
- Riboflavin (B2)
- Niacin (B3)
- Pantothenic Acid (B5)
- Pyridoxine (B6)
- Folate (B9)
- Vitamin E
Essential Minerals
- Iron
- Magnesium
- Phosphorus
- Potassium
- Calcium
- Zinc
- Selenium
- Copper
- Manganese
- Natural Sodium (very low)
Note: Nutrient content can vary depending on the wheat variety and freshness, but fresh-milled flour is always more nourishing than refined alternatives.
Check out my post on whole wheat nutrition to learn more about how whole grains support digestion, blood sugar balance, and overall nourishment.
What Makes This a Pan de Mie–Style Loaf
Pan de Mie simply means “soft bread” in French. This recipe is adapted for fresh-milled flour and sourdough, so it is not a strict Pan de Mie, but it loosely follows the same concepts.
The shape of this loaf, however, is undeniably in the style of a traditional Pan de Mie, thanks to the use of a lidded Pullman Pan.
Do I Need a Pullman Pan?
Yes—if you want a traditional Pan de Mie shape, you will need one.
That said, this is largely a stylistic choice. The perfectly square sides are very pretty, but this dough will also bake well in a standard loaf pan.
This recipe was created for a large Pullman Pan, so you’ll either need to use two standard loaf pans or halve the recipe.
Whether or not you use a Pullman Pan, the recipe is highly flexible. Below is the baking schedule that works best for my family; however, you can adjust it to suit your life and schedule.
My Favorite Sourdough Pan de Mie Baking Schedule
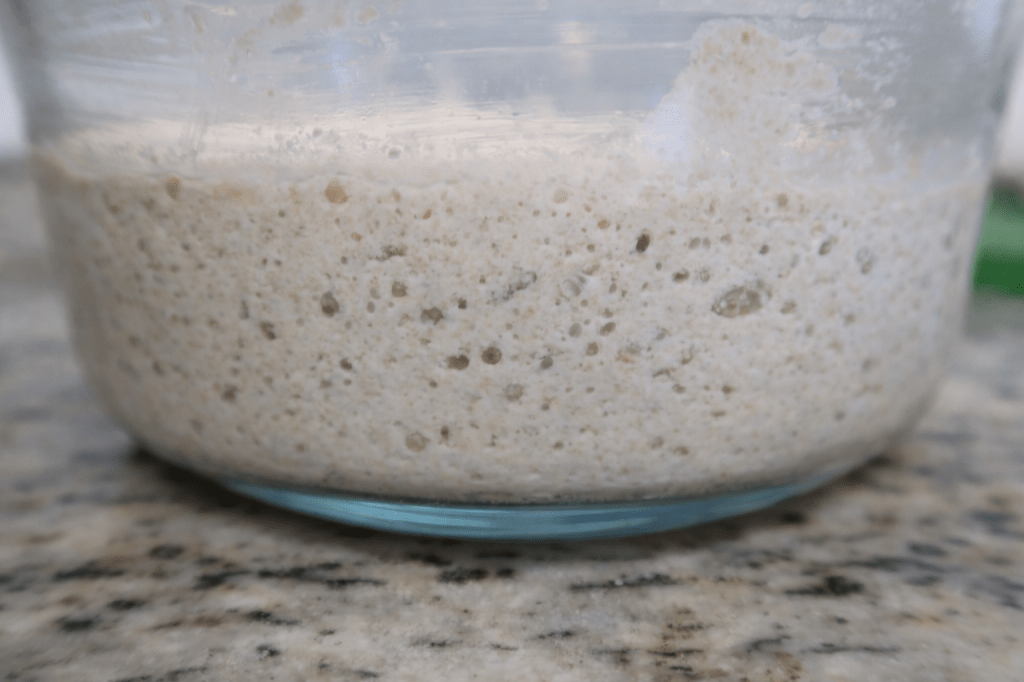
The Night Before
Mix 160 g flour, 180 g water, and 20 g sourdough starter. Cover and let rest overnight until bubbly and active.
When You Start Your Coffee (8:00–9:00 a.m.)
- Mill your flour.
- Mix the flour and water and allow the dough to autolyse for 1 hour.
Around 10:00 a.m.
- Add the starter, powdered milk, oil, sugar, and salt.
- Knead using a stand mixer, or perform 3 stretch-and-folds with about 20 minutes between each set.
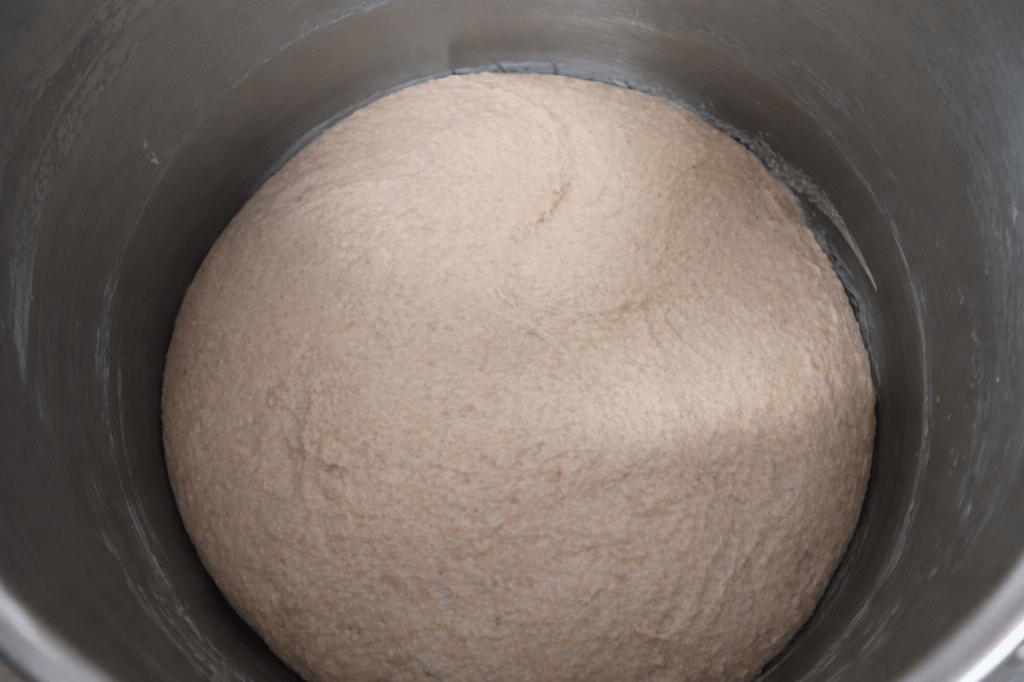
Let the dough bulk rise. I usually aim for about 3 hours, but this will vary depending on the temperature of your home.
Visual cue: The dough should look slightly risen and puffed, not dense or tight.
Tip: To create a warm, humid environment, preheat your oven to its lowest setting, then turn it off. Place the covered dough inside and prop the door open slightly with a wooden spoon.
Around 1:00 p.m.
- Grease your pan(s) and shape the dough.
- Cover and let rise until the dough reaches the top of the pan.
Late Afternoon or After Dinner
When the dough is near the top of the pan, preheat the oven and bake.
Timing & Flavor Notes
Sourdough is highly flexible. For a tangier loaf, extend the bulk fermentation. This can be done by preparing the starter later in the day, kneading after dinner, and allowing the dough to bulk overnight.
Fresh-milled flour ferments quickly. If using a long bulk fermentation, you may want to encourage the second rise by placing the shaped dough in a warm spot.
✨ Note: The second rise should not be rushed, as in the loaf must reach the top of the pan before baking. If life happens and you must leave the dough, cover your shaped loaf and refrigerate it. Cold fermentation slows the rise and develops a deeper, tangier flavor.
Tools You’ll Need
- Grain mill
- Digital kitchen scale
- Mixing bowl or Stand Mixer
- Pullman loaf pan with lid
- Dough whisk or spoon
- Proofing cover (tea towel or bowl cover)
Ingredients
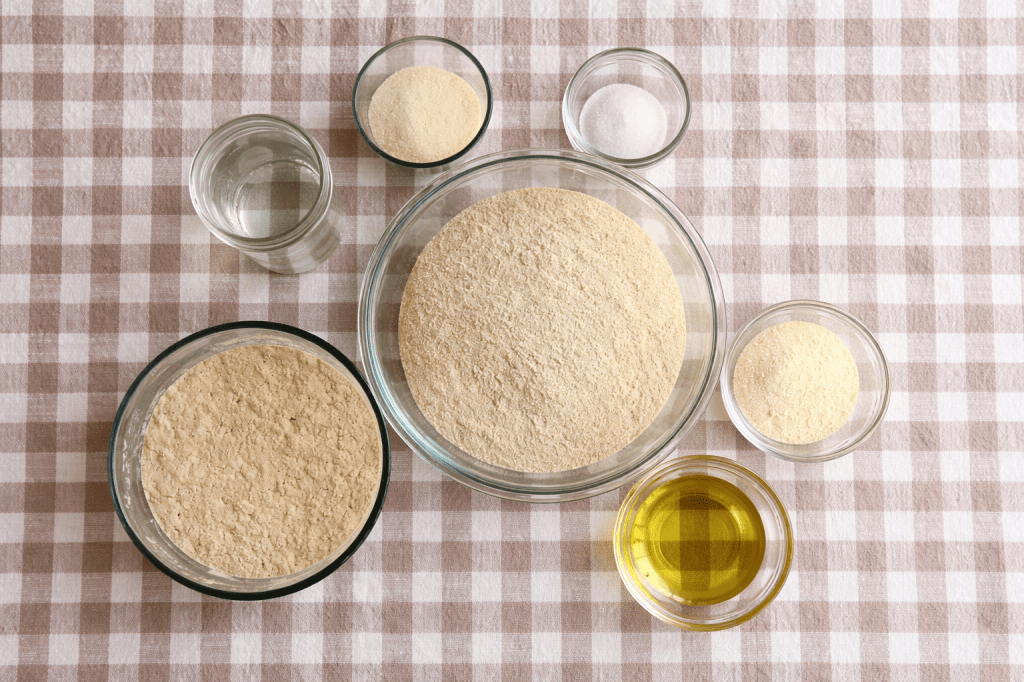
- Fresh-milled hard white wheat, or wheat of choice with high protein content
- Active sourdough starter
- Water
- Powdered milk
- Sugar
- Oil (your preference)
- Salt
Step-by-Step Instructions
This recipe uses a stiff starter. I maintain mine at ~50% hydration and build a levain before baking.
Step 1 – Prepare Starter (If Needed)
If using a stiff starter, prepare a levain ahead of time so it is active and bubbly at mixing. Add 160 g flour, 180 g water and 20 g starter until incorporated to create levain.
Step 2 – Mill the Grain
Mill your grain fresh immediately before mixing the dough.
Step 3 – Initial Mix
In a large bowl, combine only the flour and water. Mix until fully hydrated and no dry flour remains.
Step 4 – Autolyse
Cover and allow the dough to rest for a minimum of 30 minutes (1 hour preferred).
Autolyse is simply mixing flour and water together and allowing them to rest.
Step 5 – Add Remaining Ingredients
Add the sourdough starter, powdered milk, oil, sugar, and salt to the dough.
Step 6 – Kneading
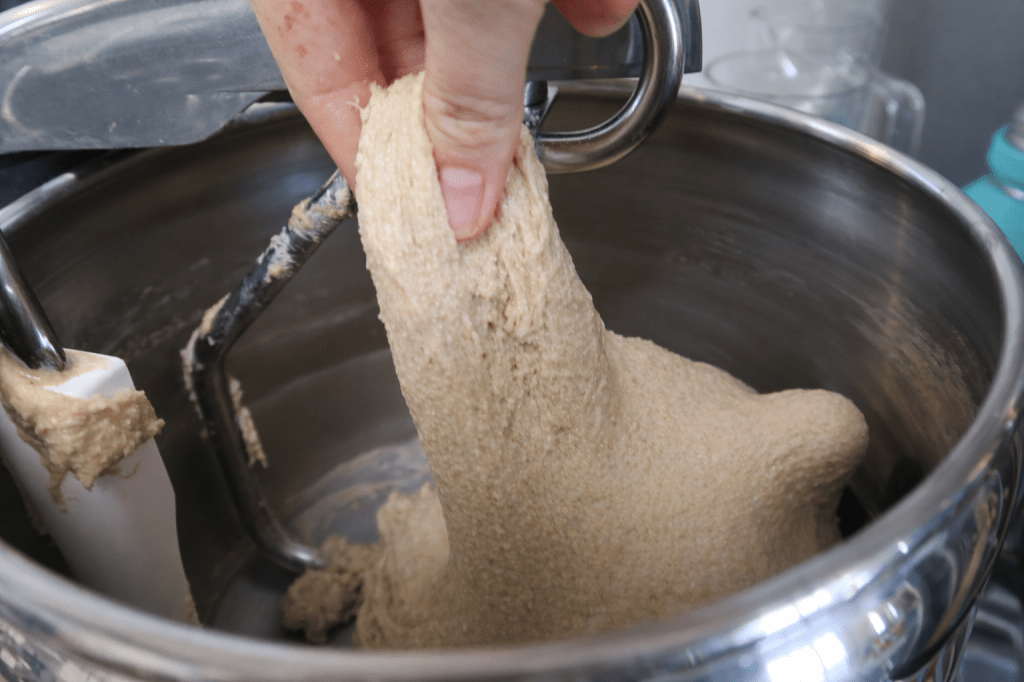
Knead until the dough pulls away cleanly from the bowl and feels smooth and elastic, without immediate tearing.
Alternatively, you can perform 3 stretch and folds with around 20 minutes between each fold.
Step 7 – First Rise
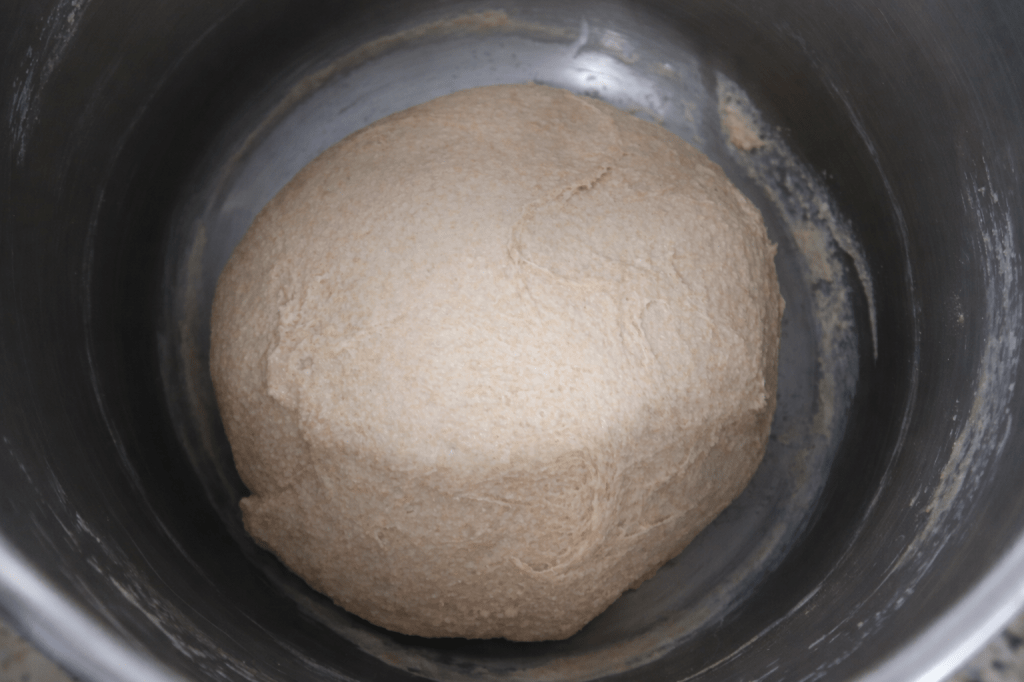
Cover and let rise for at least 2 hours, or until the dough has noticeably puffed up.
This rise is flexible—longer fermentation will result in a more sour loaf.
Step 8 – Shape

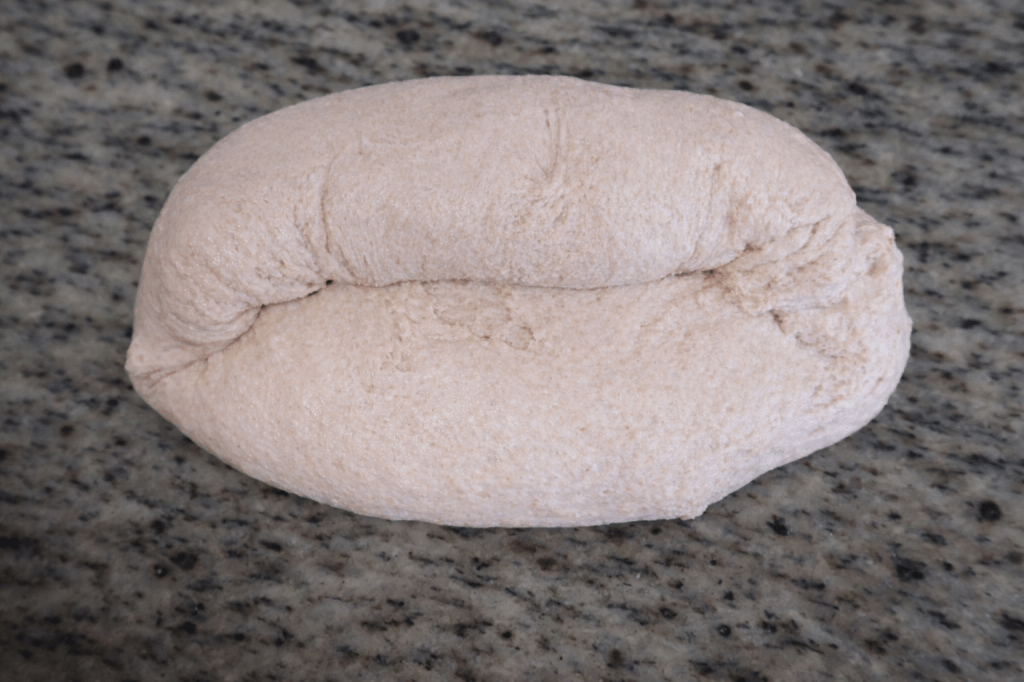
Grease one large Pullman pan or two standard loaf pans.
Shape the dough by flattening into a rectangle, folding one long side toward the center, tucking in the corners, and rolling tightly into a loaf. Pinch the seam closed.
Place dough seam-side down into the pan(s) and cover with greased plastic wrap.
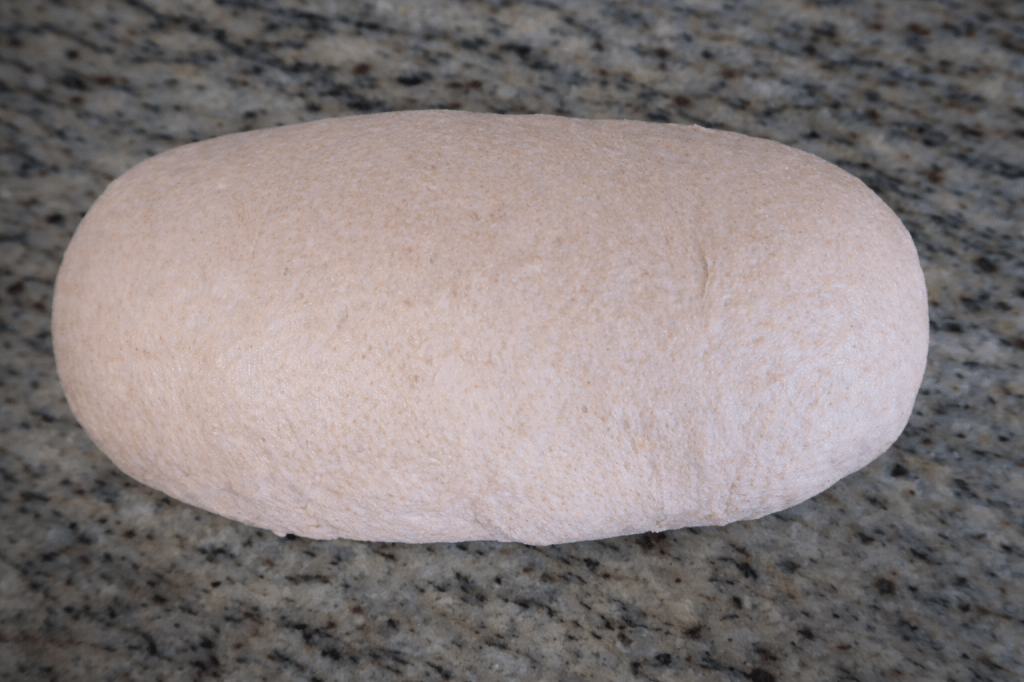
Step 9 – Final Proof

Allow the dough to rise until it is just at the top of the pan.
Step 10 – Baking
Preheat oven to 350°F.
Place the lid on the Pullman pan and bake for 25 minutes.
Remove the lid and continue baking for 20–25 minutes, or until the loaf reaches an internal temperature of 190°F.
Step 11 – Cooling

For a soft loaf, and to avoid the bread caving in, let the baked loaf rest covered with a kitchen towel for 5 minutes in the pan. Then remove from the pan onto a wire rack and let fully cool with a kitchen towel laying over it.
Everyday Fresh-Milled Sourdough Sandwich Bread (Pan de Mie Method)
Gram measurements are highly recommended. Fresh-milled flour varies based on grain, mill, and humidity. Weighing ingredients ensures proper hydration, structure, and consistent results. Volume measurements are provided only as a convenience.
Ingredients
- 630 g (about 5 cups) fresh-milled flour
- 400 g (1⅔ cups) water
- 360 g (1½ cups) active sourdough starter
- 32 g (¼ cup) powdered instant milk
- 36 g (3 tablespoons) oil
- 60 g (¼ cup + 1 tablespoon) sugar
- 13 g (2¼ teaspoons) fine salt
Instructions
Step 1: Starter & Grain Preparation
- If using a stiff starter, prepare a levain ahead of time so it is active and bubbly. Add 160 g flour, 180 g water and 20 g starter until incorporated to create levain.
- Mill your grain fresh immediately before mixing.
Step 2: Initial Mix & Autolyse
- In a large bowl, combine only the flour and water.
- Mix until fully hydrated and no dry flour remains.
- Cover and rest for a minimum of 30 minutes (1 hour preferred).
Autolyse is simply mixing flour and water together and allowing them to rest.
Step 3: Add Remaining Ingredients & Knead
- Add the sourdough starter, powdered milk, oil, sugar, and salt.
- Knead until the dough pulls away cleanly from the bowl and feels smooth and elastic, without immediate tearing.
Step 4: First Rise
Cover and let the dough rise for at least 2 hours, or until noticeably puffed. This rise is flexible—longer fermentation will result in a more sour loaf.
Step 5: Shaping & Panning
- Grease one large Pullman pan or two standard loaf pans.
-
Flatten the dough into a rectangle, then:
- Fold one long side toward the center
- Tuck in the corners
- Roll tightly into a loaf
- Pinch the seam closed.
- Place seam-side down into the pan and cover.
Step 6: Final Proof & Baking
- Allow the dough to rise until it is just at the top of the pan.
- Preheat oven to 350°F.
- Place the lid on the Pullman pan and bake for 25 minutes.
- Remove the lid and bake an additional 20–25 minutes, until the internal temperature reaches 190°F.
- Let rest in the pan for five minutes, then turn out of pan and cool completely on a wire rack before slicing.
Cooling, Slicing, and Storage
- Cool completely before slicing: Fully cool your bread to achieve the best interior texture. Cutting too soon can result in gummy slices.
- Slice as needed: Only slice the bread when you’re ready to use it to preserve moisture.
- Freezing: Slice the entire loaf, wrap in freezer paper and plastic wrap, label, and freeze for later use.
Troubleshooting
- Loaf didn’t rise well: Fresh-milled flour contains sharp bran and germ, which can make gluten development more challenging. Knead thoroughly to develop strong gluten strands. If a mixer isn’t giving great results, try the stretch-and-fold method.
- Gummy bread: You may have cut the loaf too soon or underbaked it. Always allow the bread to fully cool before slicing.
- Crumbly bread: You may not have added enough water. Follow the gram measurements closely, but trust your instincts—fresh-milled dough should feel slightly tacky. If it’s too dense or dry, add a small amount of water.
Variations & Notes
- Pan options: You don’t need a Pullman Pan. A standard loaf pan works; either halve the recipe or use two pans.
- Flour choices: High-protein wheat works best, but you can mix different wheats for flavor variation. Keep a higher percentage of high-protein wheat for strong gluten.
- If you’re new to fresh-milled baking, my Wheat Berry 101 post walks through what wheat berries are and what type of wheat is best for various baking applications.
- Baking tips: Baking can be variable. Observe the dough’s look and feel for best results. Slightly tacky dough is ideal.
FAQ
Can I use store-bought whole wheat flour?
Yes! Store-bought flour may not contain the full bran and germ, but you’ll still get a delicious loaf.
Can I make this dairy-free?
Absolutely! Omit the dry powdered milk. The loaf will be slightly less soft but still delicious.
Can I ferment overnight?
Yes! Overnight fermentation will produce a more sour flavor while keeping the bread nutritious. Let the shaped dough rise in a warm place to avoid excessive sourness.
I hope your family enjoys this Fresh-Milled Sourdough Pan de Mie Sandwich Bread as much as mine does! It’s a versatile, everyday loaf that makes life simpler and tastier.
How do you enjoy your fresh-milled sourdough sandwich bread? Share your favorite ways in the comments below!
Blessings,
Payton


Leave a comment