
This post may contain affiliate links. See our disclosure policy.
Are you looking for a dependable whole-wheat dinner roll to nourish your family well—one that is easy, repeatable, and endlessly versatile? This simple, frugal recipe creates soft, fluffy rolls your whole family will love.
Transitioning to fresh-milled baking can feel daunting—I remember feeling the same way. In this post, I’ll walk you through everything you need to know to create dependable, soft, freshly milled yeast rolls at home.
Fresh-milled flour is the foundation of this recipe. Before we begin baking, let’s take a brief look at why it is such a wonderful and nourishing flour to use.
Why Bake with Freshly Milled Flour?
Simply put, it is much more nutrient-rich.
When wheat is milled, and the bran and germ are removed to create all-purpose flour, most of the fiber, vitamins, minerals, and healthy fats are lost. What remains is mostly starch and some protein. Because starch is rapidly broken down into glucose, baked goods made with white flour can cause a much sharper rise in blood sugar compared to whole-grain versions.
Below is a list of the nutrients in the humble wheat berry. It’s amazing!
✨ Nutrients in Fresh-Milled Whole Wheat Flour
Fresh-milled flour is rich in naturally occurring nutrients that are often lost in store-bought white flour. By milling your own grains at home, you retain the full spectrum of vitamins, minerals, and fiber—exactly as God designed it.
Macronutrients
- Protein
- Healthy Carbohydrates
- Dietary Fiber
- Natural Fats (small amounts)
Key Vitamins
- Thiamine (B1)
- Riboflavin (B2)
- Niacin (B3)
- Pantothenic Acid (B5)
- Pyridoxine (B6)
- Folate (B9)
- Vitamin E
Essential Minerals
- Iron
- Magnesium
- Phosphorus
- Potassium
- Calcium
- Zinc
- Selenium
- Copper
- Manganese
- Natural Sodium (very low)
Note: Nutrient content can vary depending on the wheat variety and freshness, but fresh-milled flour is always more nourishing than refined alternatives.
✨Check out my blog post here for a more thorough breakdown of the benefits of fresh-milled flours.
Now that we understand the benefits of freshly milled flour, let’s take a look at which wheat berries work best for baking soft, dependable yeast rolls.
What Type of Wheat Berries Should I Use?
Different wheat berries contain varying amounts of protein, and two key proteins are essential for creating a strong gluten network: glutenin and gliadin.
- Glutenin – Gives dough strength and elasticity, helping bread hold its shape and rise.
- Gliadin – Makes dough stretchy and extensible, allowing it to expand during fermentation and baking.
When these two proteins work together, you get a strong, resilient gluten network that produces a perfect rise.
For yeasted breads, choose hard red or hard white wheat, which have enough protein to create soft, fluffy loaves.
If you enjoy experimenting with ancient grains, feel free to mix them with your hard wheat. Just keep in mind that using only ancient grains may result in a lower rise.
✨Check out my blog post that gives more information on wheat berries and their uses.
Now that you’ve selected your wheat, let’s prepare the simple tools needed for success.
Tools You’ll Need
- Grain mill
- Stand mixer (optional, but helpful)
- Kitchen scale (preferred) or measuring cups and spoons
- 10×13 baking dish for large bakery-style rolls (or 9×13 for smaller rolls)
Ingredients You’ll Need
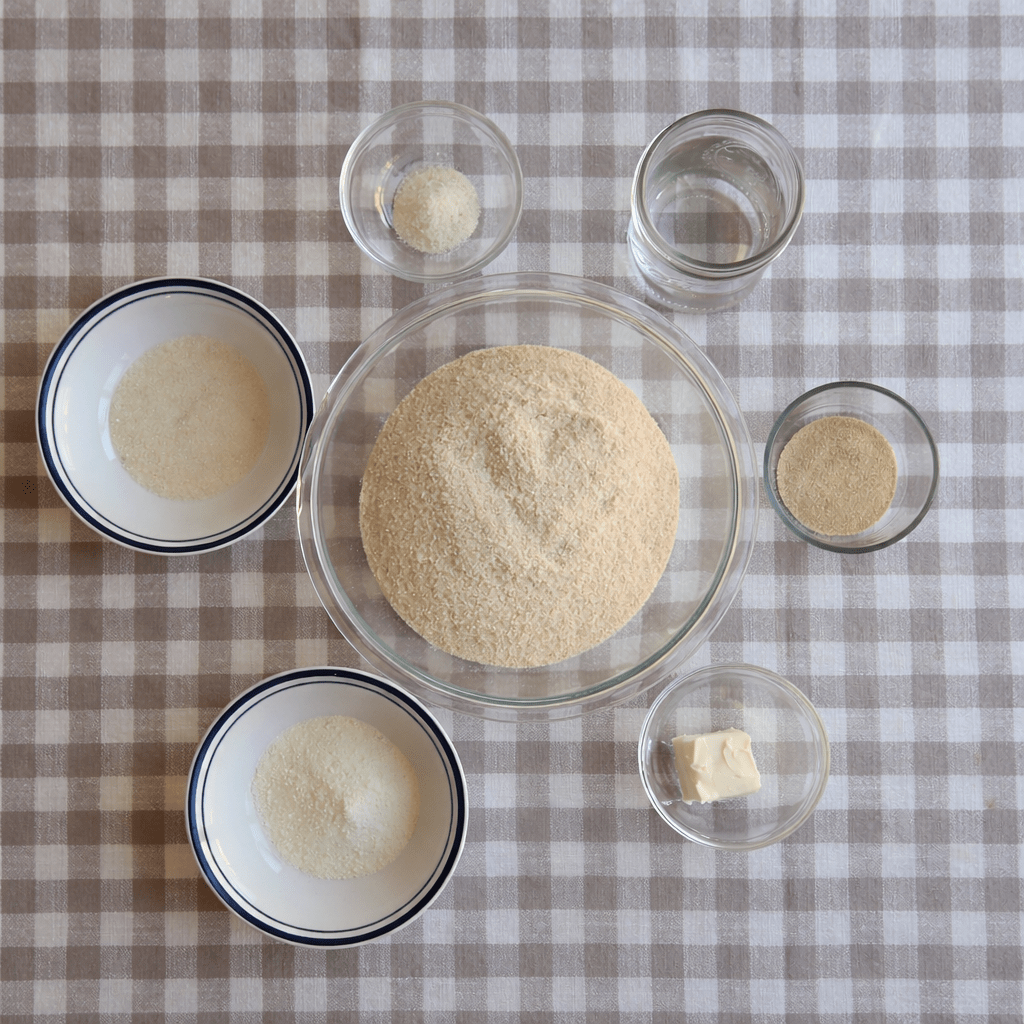
- Fresh-milled hard white wheat, hard red wheat, or a blend
- Water
- Powdered milk
- Sugar
- Unsalted butter, room temperature
- Salt
- Instant yeast
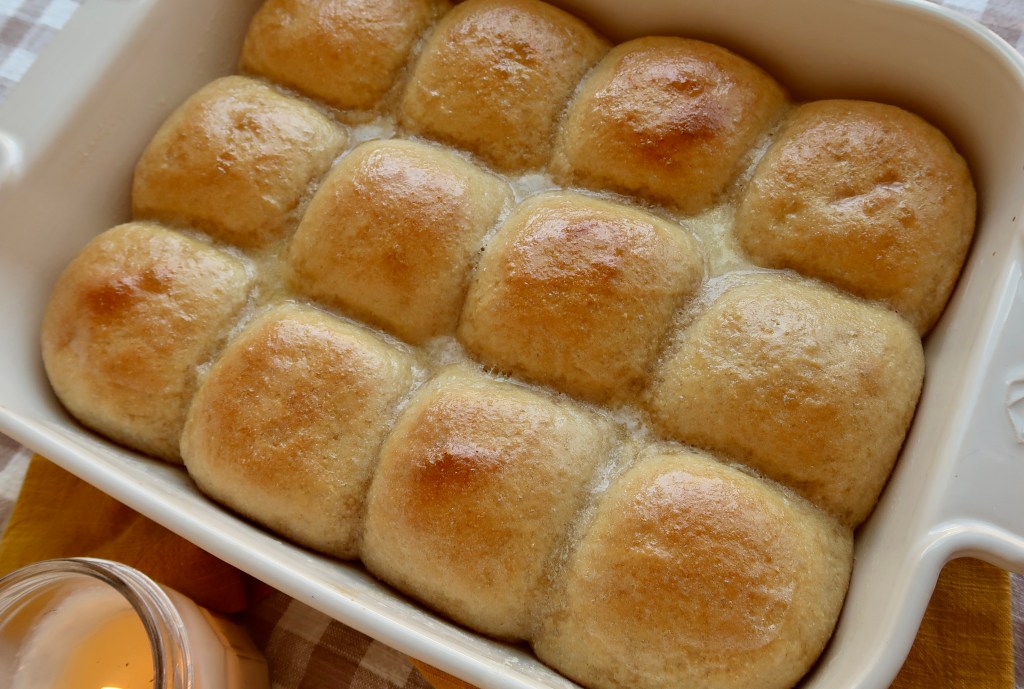
Step-by-Step: How to Make Freshly Milled Yeast Rolls
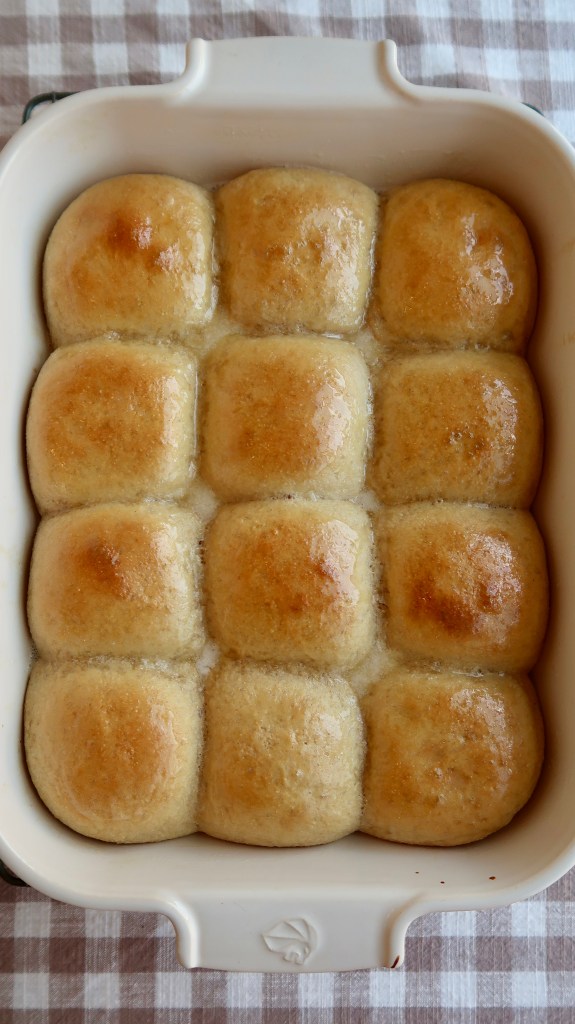
Note about dough amount: This recipe is written for a 10×13 pan and makes 12 large, bakery-style rolls. If this is more than your family needs, a smaller batch for a 9×13 baking dish is included in the notes.
Step 1: Mill Your Flour
Wheat berries that work well for this dough are hard white wheat and hard red wheat. Ancient grains are a lovely addition, but should not exceed 40% of the total flour.
Mill your flour.
Step 2: Make the Dough
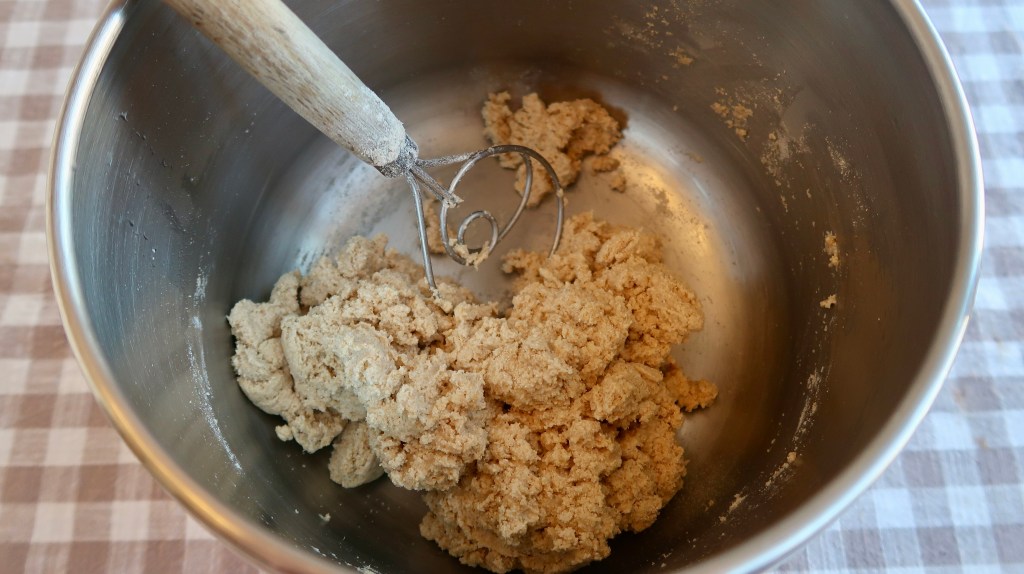
Autolyse your dough by combining the flour and water until the flour is fully incorporated. Let rest, covered with a tea towel, for 1 hour.
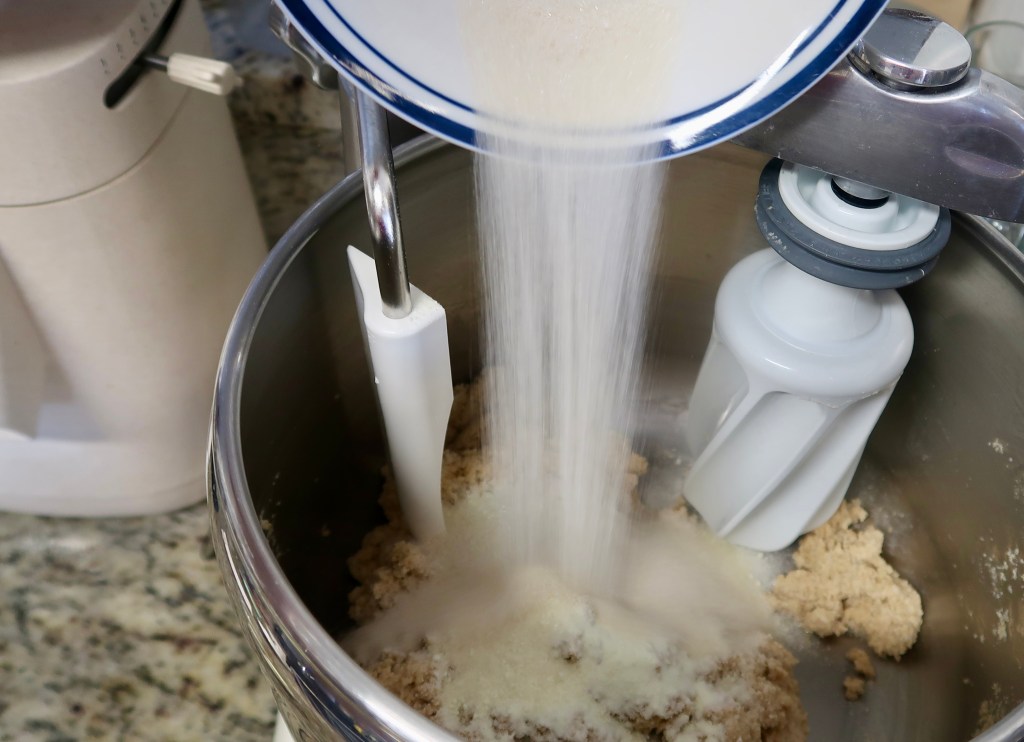
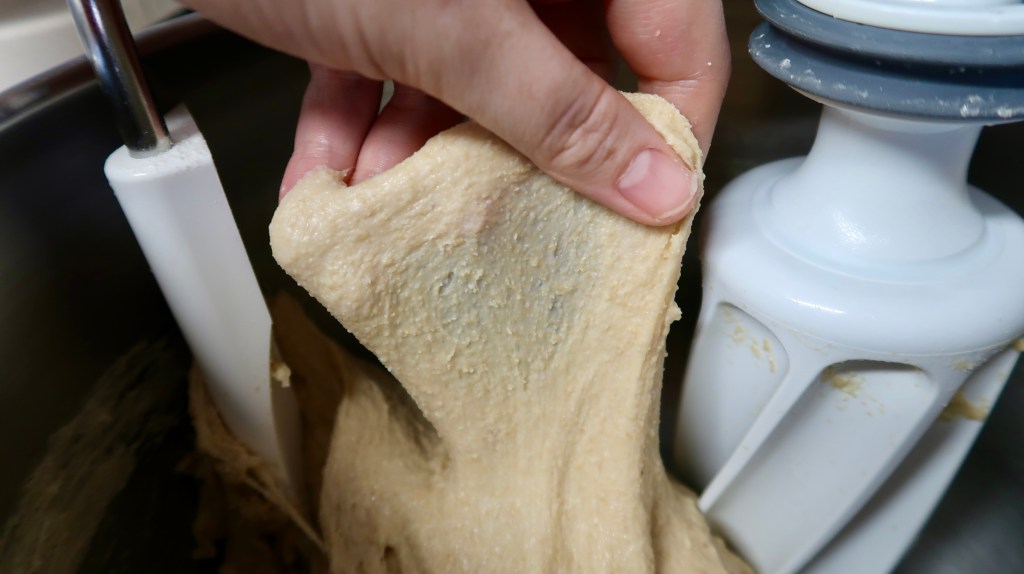
After the autolyse, add the powdered milk, sugar, salt, and instant yeast to your dough. Knead for 10 minutes. Now add your butter and knead until the dough does not tear when stretched and a windowpane forms.
Step 3: First Rise (Bulk)
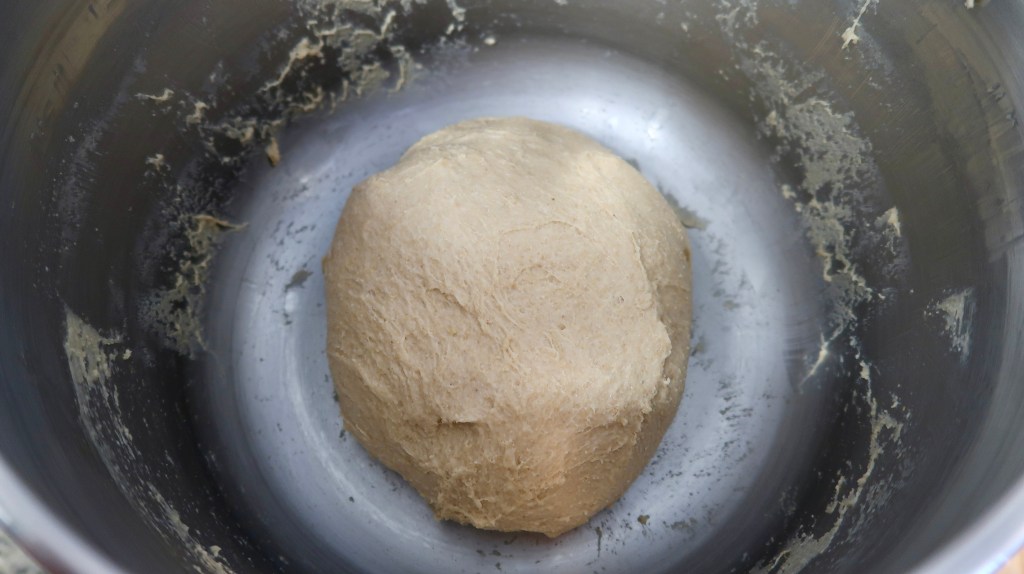
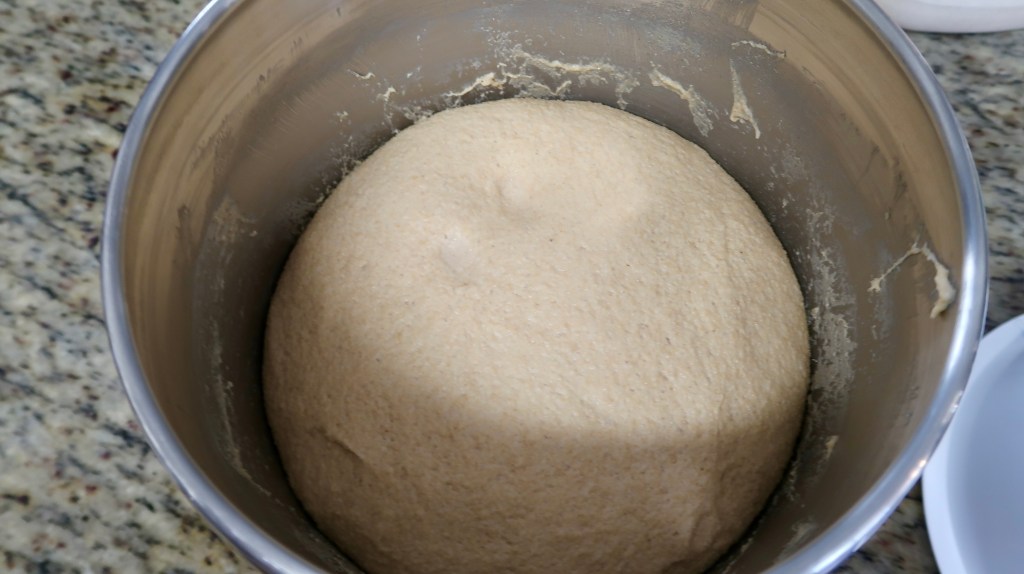
Let the dough rise, covered, until slightly less than doubled. It helps if you let your dough rise in a clear, glass bowl. Use a dry-erase marker to mark a line, at eye level, where the dough starts. By the 1-hour mark, you should see a significant difference in the rise.
The dough is ready to shape when an indentation slowly springs back, but does not fully fill in. Be sure to wet your finger to do this test.
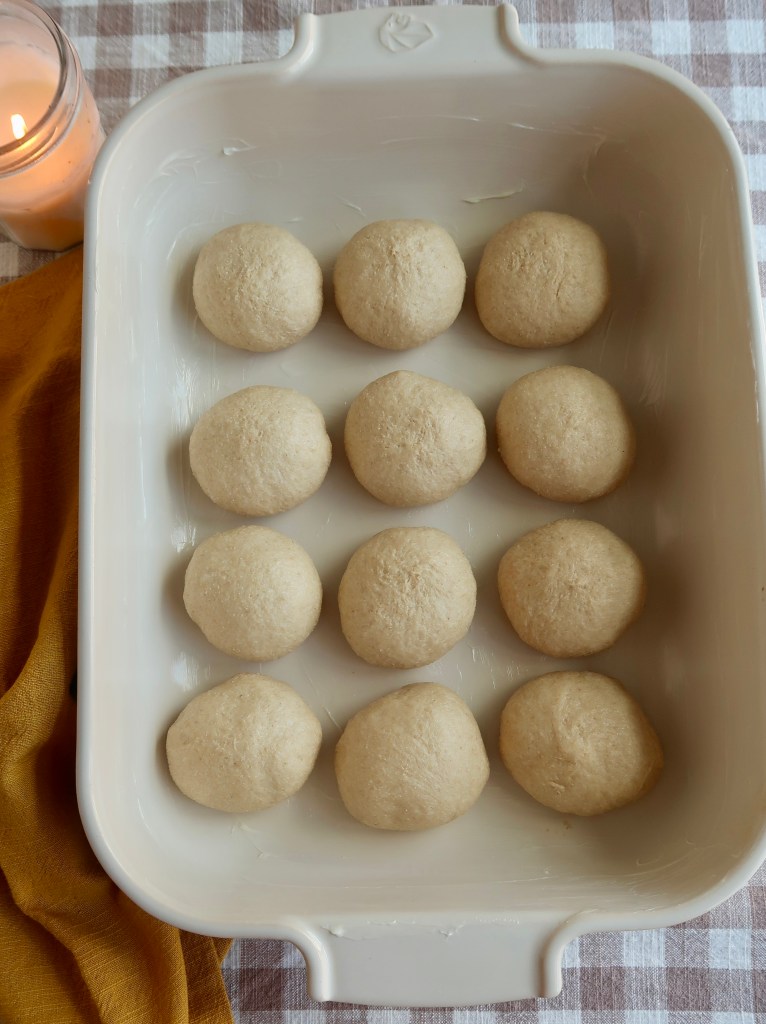
Step 4: Shaping the Rolls
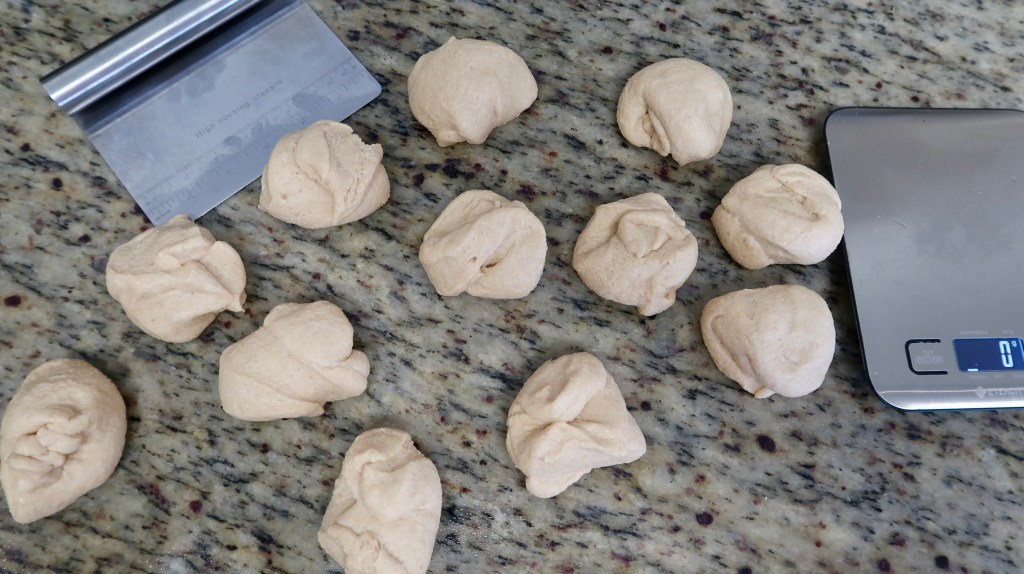
Divide the total dough weight by 12 for evenly sized rolls (≈85–90 g each).
Grease a 10×13 baking dish.
Lightly grease your work surface with oil. Divide the dough into 12 equal pieces. Flatten gently, pinch edges toward the center, then flip seam-side down and roll under your palm to create surface tension.
Place the shaped dough in the greased pan and repeat for the rest of the dough.
Cover the shaped dough with either a wet tea towel or greased plastic wrap.
Step 5: Final Rise
Preheat your oven to 350°F
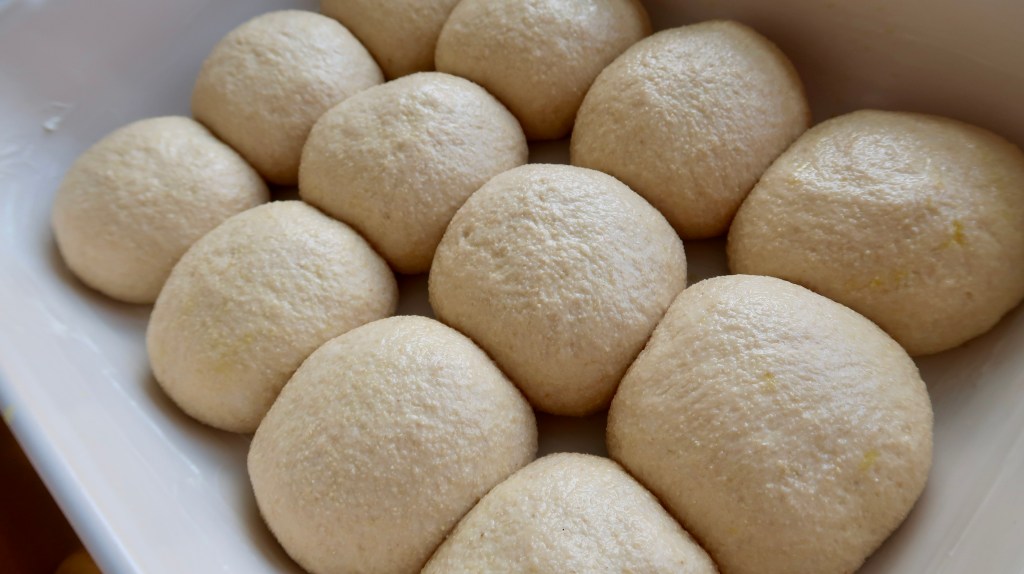
Let the rolls rise 20–30 minutes, until they have increased slightly in size and have a puffy appearance.
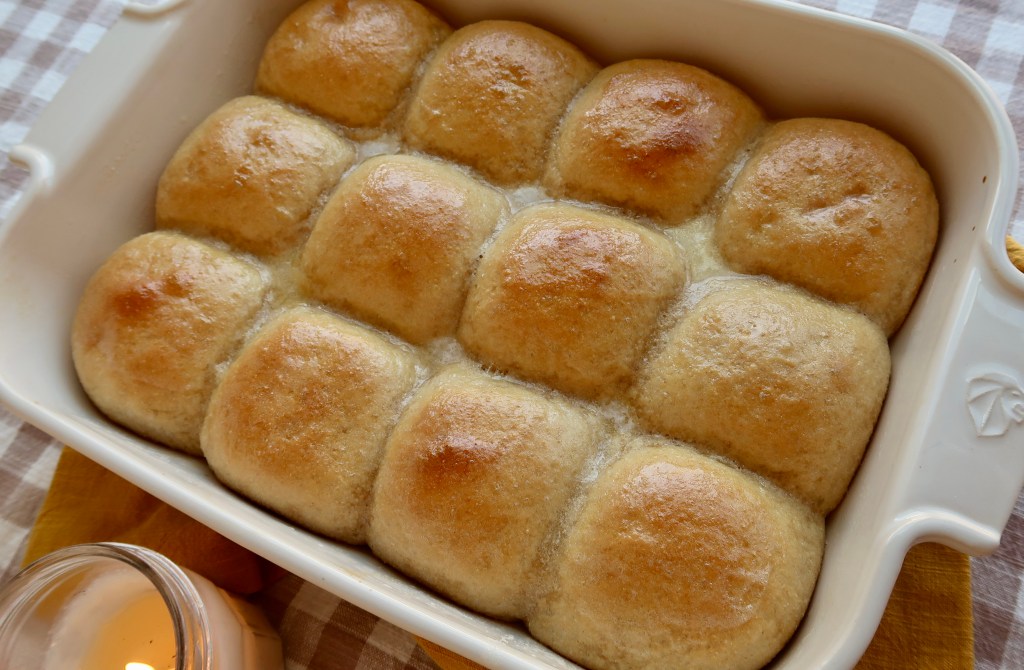
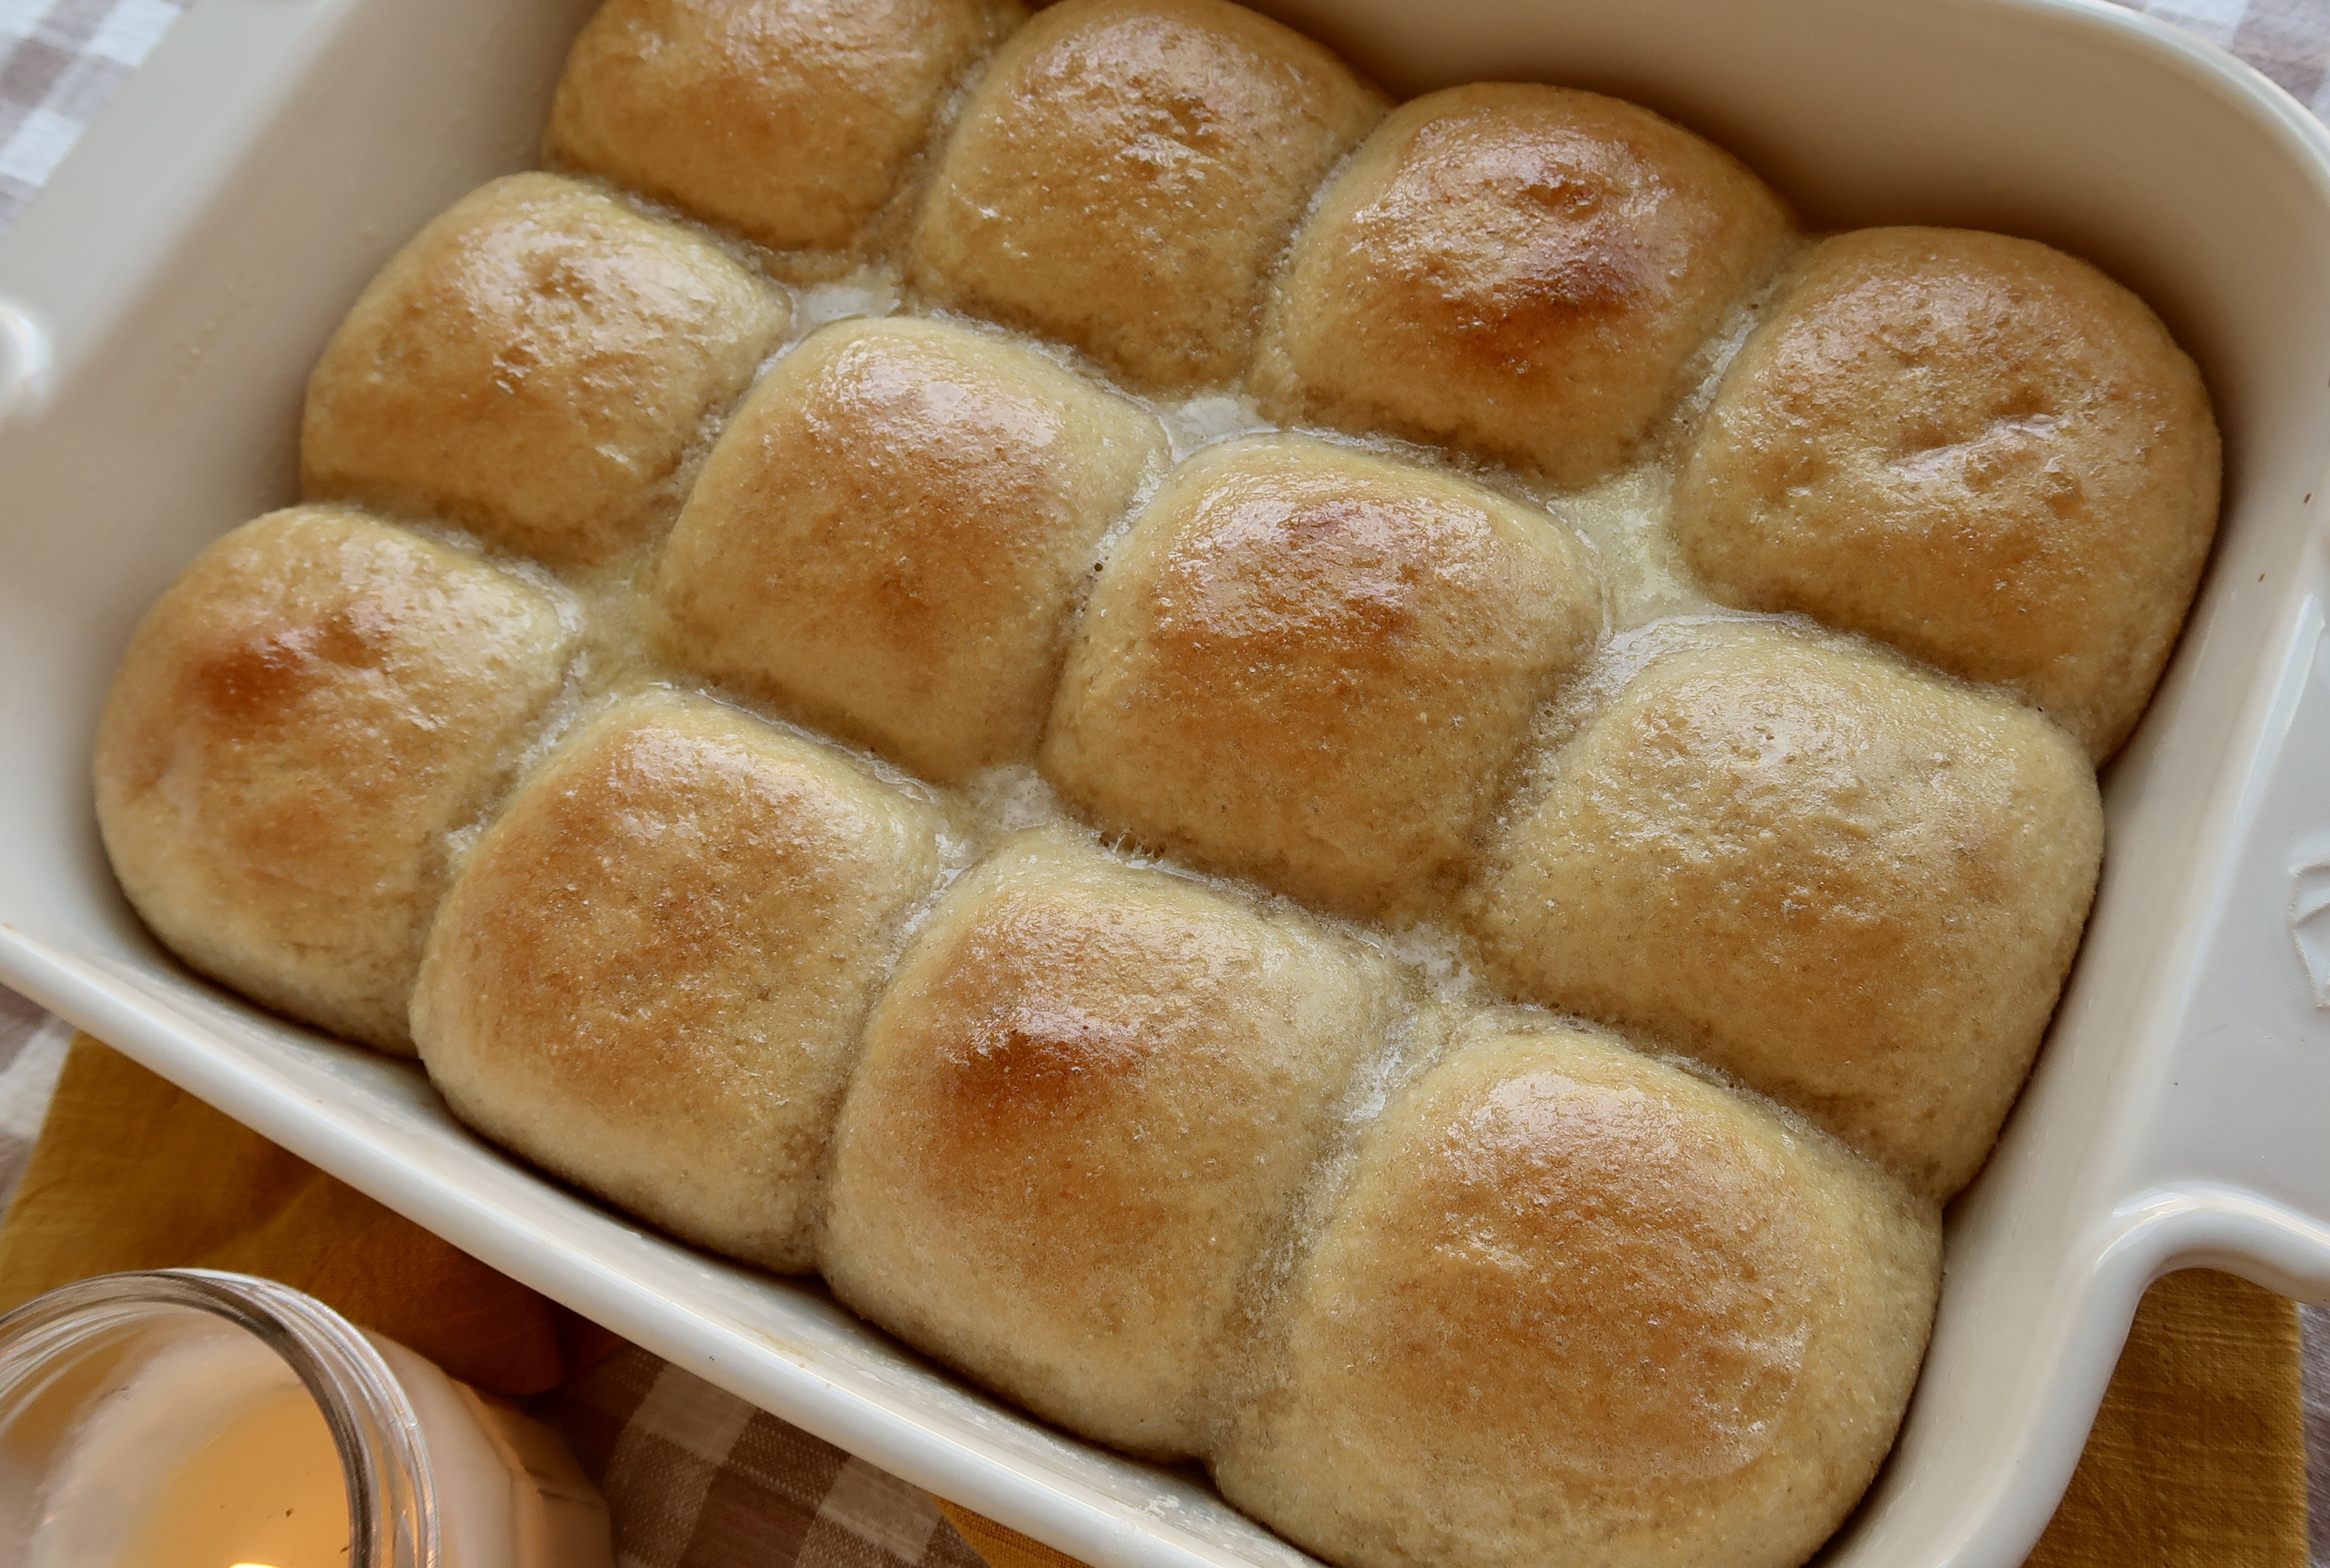
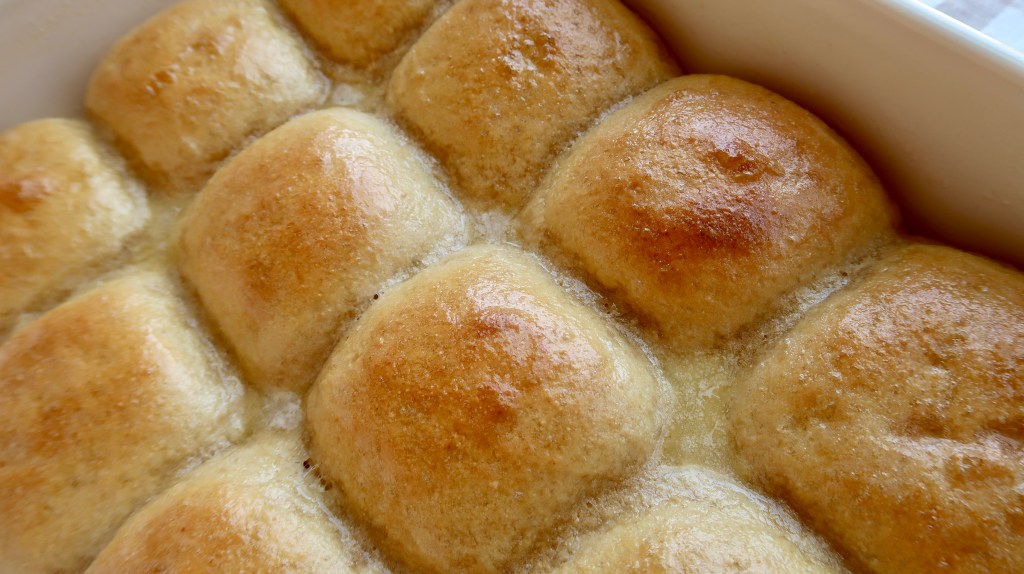
Step 6: Bake and Cool
Brush with an egg yolk + 1 tbsp milk for the best golden color, though this is entirely optional.
Bake for 25-30 minutes at 350°F or until golden and the center rolls reach 190–195°F.
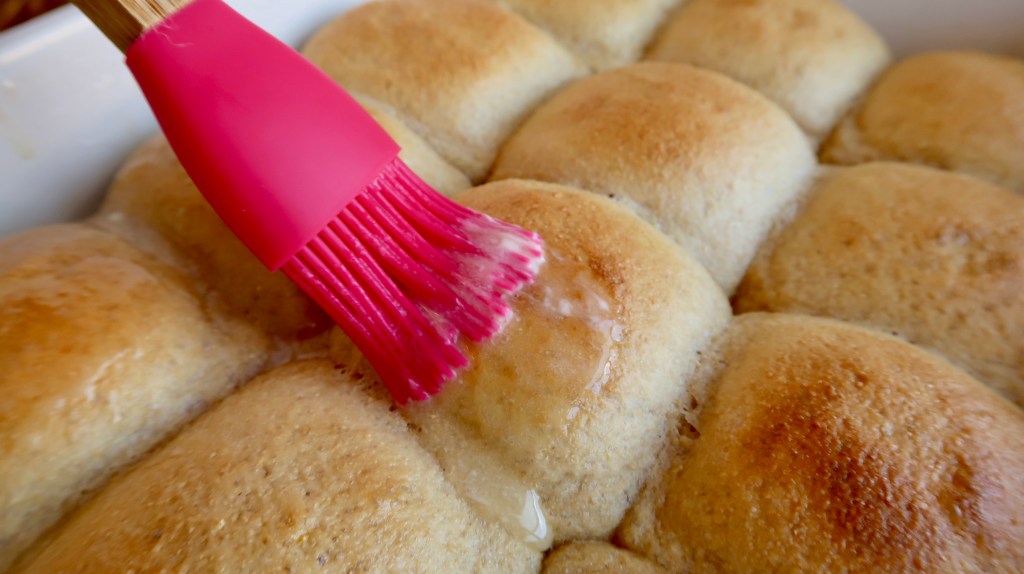
Brush with butter again, if you wish, for extra softness when you have removed them.
Let cool slightly and enjoy!
Fresh-Milled Bakery Style Yeast Rolls
Important: Use a kitchen scale for best results with fresh-milled flour. Gram measurements are most accurate. Volume estimates are provided only as a convenience.
Ingredients
- 560 g fresh-milled flour (about 4 cups)
- 398 g water (about 1½ cups)
- 40 g sugar (about 3 tbsp)
- 40 g powdered milk (about ⅓ cup)
- 10 g salt (about 1¾ tsp)
- 9 g instant yeast (about 2½ tsp)
- 50 g unsalted butter, softened (about 3 tbsp)
Step 1 – Mill Your Flour
Finely mill hard white or hard red wheat. Ancient grains may be used, but should not exceed 40% of total flour.
Step 2 – Make the Dough
Combine flour and water until incorporated. Cover and rest 1 hour (autolyse). Add powdered milk, sugar, salt, and yeast. Knead 8–10 minutes, then knead in butter until smooth and elastic.
Step 3 – First Rise
Cover and rise until slightly less than doubled. Dough should slowly spring back when gently pressed.
Step 4 – Shape the Rolls
Divide dough into 12 equal pieces (≈85–90 g each). Shape into tight rounds and place in a greased 10×13 pan. Cover.
Step 5 – Final Rise
Preheat oven to 350°F. Let rolls rise 20–30 minutes until slightly puffy.
Step 6 – Bake and Cool
Brush roll tops with an egg yolk + 1 tbsp milk, for a golden color, if desired. Bake 25-30 minutes at 350°F until golden and center rolls reach 190–195°F. Brush again with butter if desired. Cool slightly before serving.
Pan Size Note
This recipe is written for a 10×13 pan to create large, bakery-style rolls.
If using a 9×13 pan, use the smaller batch below for proper spacing and even baking.
Smaller Batch for 9×13 Pan (12 Medium Rolls)
- 416 g flour (about 3⅓ cups)
- 295 g water (about 1¼ cups)
- 33 g sugar (about 2½ tbsp)
- 33 g powdered milk (about ¼ cup)
- 8 g salt (about 1½ tsp)
- 7 g instant yeast (about 2¼ tsp)
- 33 g unsalted butter, softened (2 tbsp)
Tips for Success
- Let your dough rest (autolyse) for at least 1 hour with just the flour and water combined—this gives the best results.
- If you are combining different grains, make sure the primary grain has a high protein content (like hard red or hard white wheat).
- Wait to incorporate your butter until after the dough has been kneaded for about 10 minutes, then continue kneading until the dough is smooth, slightly tacky, and stretches without tearing.
- Brushing the rolls with an egg yolk mixed with 1 tbsp milk before baking gives the tops a golden color. Brushing with butter after baking enhances flavor and keeps the rolls soft.
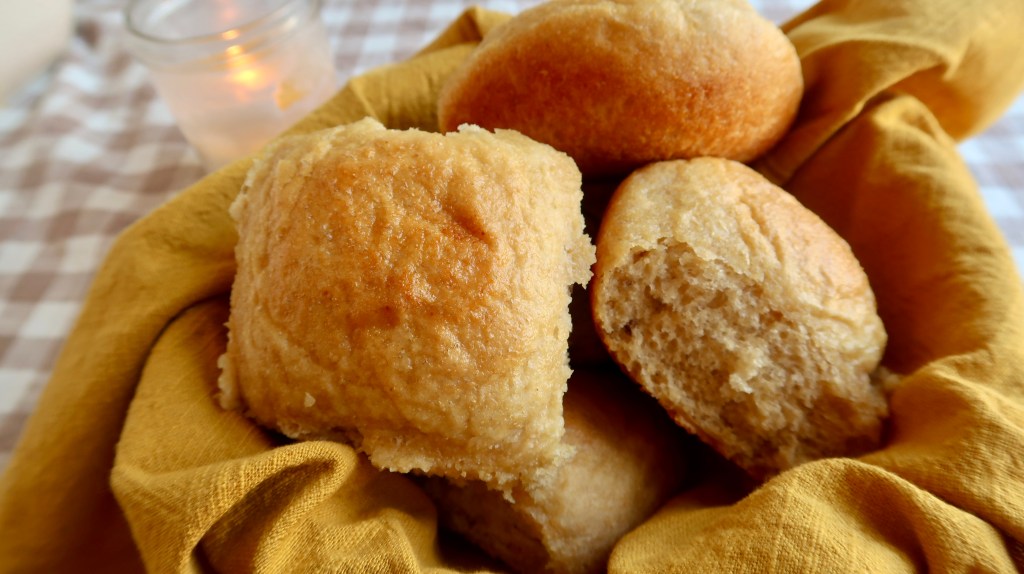
Serving Ideas
There’s more than one way to enjoy freshly milled yeast rolls! Here are a few of our favorites:
Sliders
This is our favorite way to enjoy them! Fry up some small hamburgers, top with your favorite condiments, and savor every bite.
Holiday Dinner Rolls
Perfect for any holiday meal. A fun idea is to shape your rolls into a Christmas tree! Line a baking tray with parchment paper, place the rolls in a tree shape, and leave about 1/2 inch between them to allow for rising. For an extra festive touch, brush the baked rolls with herbed butter.
Baked Sandwiches
I absolutely love baked ham and cheese sandwiches! A dear friend made them for our family a couple of years ago, and they’re still unforgettable. Try this recipe—it looks delicious!
Variations You Can Try
Try out these variations to spice up your dinner rolls:
Honey Butter Rolls
Make the rolls as usual, but when they’re nearly done, melt 2 tbsp butter on the stove. Remove from heat and stir in 1–2 tbsp honey. Brush over the tops of the finished rolls.
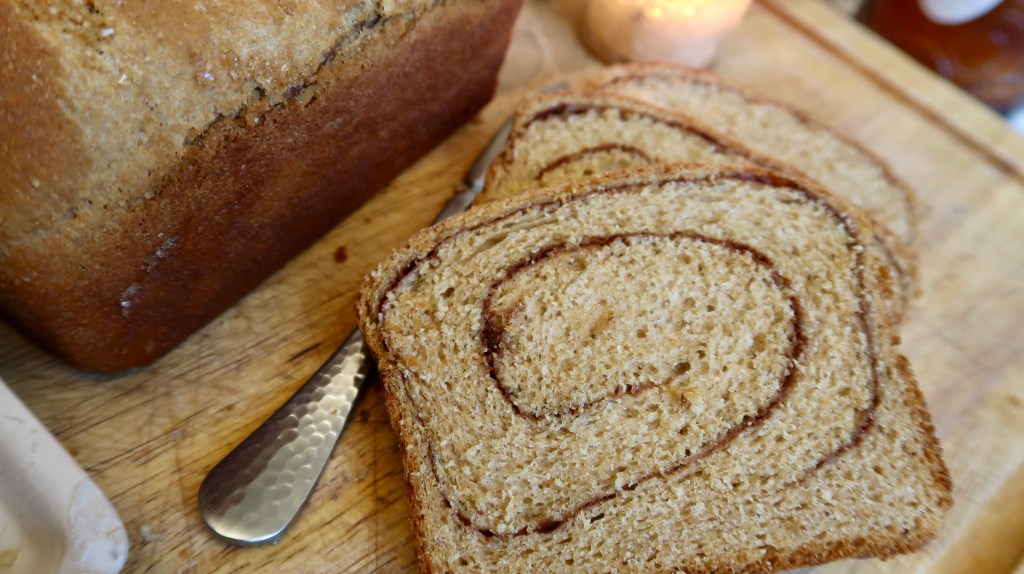
Cinnamon-Sugar Dinner Rolls
Add 1 tsp cinnamon to your dough for a sweet twist. Melt 1–2 tbsp butter and brush over the tops of the shaped rolls. Sprinkle with a mixture of cinnamon and sugar, then bake as usual.
Everything Bagel Rolls
Add 2 tsp Everything Bagel seasoning to your dough. Before baking, brush the tops with an egg wash (1 egg yolk beaten with 1 tbsp milk) and sprinkle additional seasoning on top.
Storage & Make-Ahead Tips

These rolls stay fresh for up to 3 days at room temperature. Store them in a bread box or a bread bag.
✨ This bread box looks great, as well as this bread bag!
Freezing Rolls
There are two ways to freeze your rolls: unbaked but shaped or fully baked.
To freeze unbaked dough:
- Shape the dough into individual rolls.
- Place on a parchment-lined baking sheet or dish suitable for baking.
- Cover with greased plastic wrap and freeze until solid.
- Store in the same dish or transfer to a labeled freezer bag.
To bake from frozen:
- Thaw in the fridge overnight in the greased dish you plan to bake with, then let the rolls proof on the counter until fully risen before baking.
- You can also let them rise from frozen on the counter, but this may take several hours.
To reheat baked rolls:
- Warm in the oven at around 300°F, covered with aluminum foil.
- If using a glass container, let it come to room temperature before placing it in a hot oven.
FAQ
Can I make these dairy-free?
Absolutely! Flavor and browning may be slightly different. Substitute butter with an oil of your choice and omit the dry instant milk.
Can I make them ahead of time and freeze them?
Yes! This is a great “one for now, two for later” trick. Freeze either shaped dough balls or fully baked rolls—both methods work wonderfully.
Can I use store-bought whole wheat?
You can! Keep in mind that most store-bought whole-wheat flour is not truly whole grain (the bran and germ may be removed). You’ll still get soft, delicious rolls—just slightly reduce the liquid in the recipe.
Our family loves homemade yeast rolls—they’re versatile, delicious, and very filling. I hope this recipe gives you the confidence to bake Fresh-Milled Bakery-Style Rolls for your family, too!
What are your favorite ways to enjoy freshly milled yeast rolls? Let me know in the comments below!
Blessings,
Payton


Leave a comment